fsp_action=PARC_ACT_002&fsp_cmd=retrieveInvNoACT&invc_no=송장번호
Search Results for 'search'
108 posts related to 'search'
- 2021/01/22 택배사 배송추적 URL(주소) 모음 - 리스트 2
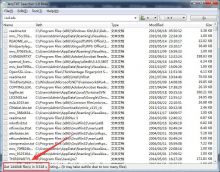
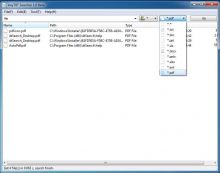
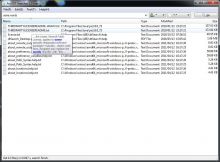
- 2021/01/13 AnyTXT Searcher 1.2.382 - 윈도우 텍스트 문서 검색
- 2020/08/12 안드로이드 ADB 비행기모드 On/Off
- 2020/06/25 mysql my.cnf 내용 설명 정리
- 2019/10/30 파이썬을 이용한 머신러닝, 딥러닝 실전 개발 입문
- 2019/04/12 CURL 사용법
- 2018/08/19 네이버 사이트 품질 가이드
- 2018/08/07 네이버 openapi 사용하여 쇼핑검색 만들기
- 2018/08/04 Atomic Email Hunter 14.4.0.371 ( Multilingual ) - 메일 수집 발송 프로그램
- 2018/08/03 생성함수 - 배열 중간에 값 제거
- 2018/08/03 SEO 검색엔진 상위리스트 올리기
- 2018/07/25 브라우저 Agent 정보
- 2018/07/25 그누보드에서 자주사용하는 php함수모음
- 2017/04/27 귀농 귀촌 시골땅 시골집매매 시골빈집매매 촌집매매 오지땅 임야매매 매매 직거래 시골산 가격 시세 장터 사이트 추천
- 2017/02/20 INPUT TYPE
- 2012/11/02 Piwik(Open source web analytics) 네이버 한글 문제
- 2012/09/16 빠른 파일 검색 프로그램 - Everything
- 2012/07/23 InStr 함수로 문자열 찾기
- 2012/07/20 웹에서 불가능한 것을 가능케 하는 WebdriverJS
- 2012/02/07 PHP에서 홑따움표 검색처리 1
- 2012/01/02 ASP 해킹 방지 보안 방법(injection, cross site scripting...)
- 2011/12/06 레이어 공지사항(오늘 하루 그만 보기)
- 2011/12/06 Intent에서 앱 호출하는 방법 정리
- 2011/12/06 Intent 활용 예제 소스
- 2011/12/06 Intent 활용 예제
- 2011/12/06 안드로이드 apk decompile 하기 완결판 - APK 디컴파일 하기 JAVA
- 2011/12/06 원격서버의 Virtualbox 의 웹관리툴 Phpvirtualbox 관련 삽질
- 2011/11/23 유용한 ASP소스
- 2011/11/09 입력한 내용에 맞는 체크박스만 보여주기
- 2011/10/24 토렌트 검색기 소스
0 comments related to 'search'
fsp_action=PARC_ACT_002&fsp_cmd=retrieveInvNoACT&invc_no=송장번호
 |  |  |
make my.cnf file as mysvc01 user.
$ vi /engn001/mysvc01/MARIASVC/my.cnf
##---------------------------------------------------------------------------
## Author: YJ
## mysqld 데몬 프로세스 관련 설정들
##---------------------------------------------------------------------------
[mysqld]
core-file                                     # core dump 파일을 생성하도록 하기 위한 설정
user = mysvc01                                # MariaDB 엔진의 owner (user id) = DB를 실행시킬 OS 계정

port = 3306                                   # DB 포트
socket = /engn001/mysvc01/MARIASVC/mysqld.sock   # 소켓파일 경로(로컬서버 접속에 사용), 리모트 서버에는 ip와 port를 이용해서 TCP/IP 프로토콜로 접근
pid-file = /engn001/mysvc01/MARIASVC/mysqld.pid  # MariaDB 서버가 자신의 프로세스 ID를 기록하는 파일 경로 (유닉스 혹은 리눅스에서만 사용)

basedir = /engn001/mysvc01/mariadb-10.0.26    # MariaDB 엔진 경로
datadir = /data001/mysvc01/MARIASVC           # DB의 데이터가 생성될 기본 경로
tmpdir = /data001/mysvc01/tmpdir_MARIASVC     # 디스크에 임시테이블이 생성될 때 사용될 경로

#secure_file_priv = /tmp                      # LOAD_FILE() 함수 및 LOAD DATA 와 SELECT ... INTO OUTFILE 명령문이 특정 디렉토리에 있는 파일에서만 동작을 하도록 한정

##---------------------------------------------------------------------------
## Author: YJ
## Logging
##---------------------------------------------------------------------------
log-warnings = 3                            # 0 비활성화
                                            # 1 이상: 쿼리문 단위의 경고 내용까지 에러로그에 기록

log_output = FILE,TABLE                     # 로그 기록 유형 (파일과 테이블에 기록)
log-error = /logs001/mysvc01/MARIASVC/error/mysqld.err # 에러 로그파일 경로

general_log = OFF                           # 제너럴 로그 비활성화
                                            # DB에서 일어나는 모든 작업에 대한 로그를 남기게 되므로 필요할 때만 ON으로 설정해서 사용
general_log_file = /logs001/mysvc01/MARIASVC/general/mysvc01-general.log    # 제너럴 로그파일 경로

slow_query_log = ON                         # 느린 쿼리 기록 활성화
long_query_time = 0.5                       # 느린 쿼리의 기준 시간(초)
log-slow-verbosity = 'query_plan,innodb'
log_queries_not_using_indexes = OFF         # 인덱스를 사용하지 않은 쿼리 기록 여부
slow_query_log_file = /logs001/mysvc01/MARIASVC/slow/mysvc01-slow.log # 느린 쿼리 로그파일 경로


##---------------------------------------------------------------------------
## Author: YJ
## DB 기본 설정
##---------------------------------------------------------------------------

skip-name-resolve                           # 역DNS 검색 비활성화 (IP 기반으로 접속을 하게 되면 hostname lookup 과정 생략)

default_storage_engine='InnoDB'             # 기본 스토리지 엔진 설정
lower_case_table_names = 1                  # 테이블명을 소문자로 처리
sysdate-is-now                              # SYSDATE 구문을 NOW와 동일하게 처리

sql_mode="TRADITIONAL,IGNORE_SPACE,ONLY_FULL_GROUP_BY,ANSI_QUOTES"
# sql_mode 설명 : SQL문 사용 제한 = 쿼리 점검 수준
# TRADITIONAL = STRICT_TRANS_TABLES,STRICT_ALL_TABLES = 잘못된 값이 컬럼에 입력되거나 업데이트될 때 에러를 반환함
#              ,NO_ZERO_IN_DATE,NO_ZERO_DATE = 날짜타입에 0000-00-00 입력 못 하게 함
#              ,ERROR_FOR_DIVISION_BY_ZERO = 0으로 나눌 때는 오류 발생시킴
#              ,NO_AUTO_CREATE_USER = 권한 부여 문장이 실행된다고 해서 자동으로 유저를 생성하지 않게 함
#              ,NO_ENGINE_SUBSTITUTION = 기본 스토리지 엔진의 자동 대체를 방지
# IGNORE_SPACE : 프로시저나 함수명과 괄호 사이의 공백 무시
# ONLY_FULL_GROUP_BY : 그룹핑 작업을 할 때 GROUP BY 절에 그룹핑 키 컬럼들이 다 있어야만 함
# ANSI_QUOTES : 홑따옴표만 문자열 값 표시로 사용, 쌍따옴표는 문자열 리터를 표기에 사용할 수 없음
# PAD_CHAR_TO_FULL_LENGTH : MariaDB/MySQL은 기본적으로 CHAR 타입도 VARCHAR 처럼 문자열 뒤 공백 문자를 제거하는데, 공백을 제거하지 않고 채우게 하려면 설정함

#feedback = ON                              # MariaDB로 에러 내용 보내기
event_scheduler = ON                        # 이벤트스케줄러(cron, Oracle의 Job과 같은 역할) 활성화
performance_schema = ON                     # performance_schema 활성화
#performance_schema_max_digest_length=10240 # digest의 최대 길이 (digest:정형화시킨 쿼리문, 상수부분 등을 패턴화시킨다.)
plugin-load = server_audit


##---------------------------------------------------------------------------
## Author: YJ
## Character Set
##---------------------------------------------------------------------------
skip-character-set-client-handshake         # 클라이언트에서 보내지는 문자셋 정보를 무시하고 서버의 문자셋 사용
character_set_server = utf8mb4
collation_server = utf8mb4_bin
init_connect='SET collation_connection = utf8mb4_bin'
init_connect='SET NAMES utf8mb4'


##---------------------------------------------------------------------------
## Author: YJ
## Transaction 설정
##---------------------------------------------------------------------------
autocommit = ON                             # autocommit 활성화 여부
transaction_isolation = "READ-COMMITTED"    # replication을 할 때는 "레코드 기반 복제"를 사용하도록 함
# transaction_isolation 설명
# . READ UNCOMMITTED
# 다른 트랜잭션이 Commit 전 상태를 볼 수 있음
# Binary Log가 자동으로 Row Based로 기록됨 (Statement설정 불가, Mixed 설정 시 자동 변환)
# . READ-COMMITTED
# Commit된 내역을 읽을 수 있는 상태로, 트랜잭션이 다르더라도 특정 타 트랜잭션이 Commit을 수행하면 해당 데이터를 Read할 수 있음
# Binary Log가 자동으로 Row Based로 기록됨 (Statement설정 불가, Mixed 설정 시 자동 변환)
# . REPEATABLE READ (기본)
# MySQL InnoDB 스토리지 엔진의 Default Isolation Level
# Select 시 현재 데이터 버전의 Snapshot을 만들고, 그 Snapshot으로부터 데이터를 조회
# 데이터에 관해서 암묵적으로 Lock과 비슷한 효과가 나타남. 즉, Select 작업이 종료될 때까지 해당 데이터 변경 작업 불가
# 동일 트랜잭션 내에서 데이터 일관성을 보장하고 데이터를 다시 읽기 위해서는 트랜잭션을 다시 시작해야 함
# . SERIALIZABLE
# 가장 높은 Isolation Level로 트랜잭션이 완료될 때까지 SELECT 문장이 사용하는 모든 데이터에 Shared Lock이 걸림
# 다른 트랜잭션에서는 해당 영역에 관한 데이터 변경 뿐만 아니라 입력도 불가

##---------------------------------------------------------------------------
## Author: YJ
## 보안 설정
##---------------------------------------------------------------------------
#skip-external-locking                      # 외부(TCP/IP) 잠금 비활성화
enable-secure-auth                          # 서버로 구버전(4.1버전 이하) 포멧으로 된 패스워드 전달 비활성화
symbolic-links = OFF                        # 심볼릭 링크 비활성화


##---------------------------------------------------------------------------
## Author: YJ
## Connection 설정
##---------------------------------------------------------------------------
thread_handling = one-thread-per-connection # 쓰레드풀(Thread Pool) 사용 여부
                                            # 쓰레드풀을 사용하려면 pool-of-threads 으로 설정

max_connections = 250                       # 허용 가능한 최대 동시 접속수, 각각의 커넥션은 최소 thread_stack의 사이즈만큼의 메모리 사용
max_connect_errors = 1000                   # 계속적으로 문제를 발생시키는 클라이언트를 몇번째 재시도후 block할지 지정
                                            # 한번 block되면, 서버를 재시작하거나 flush host명령을 실행하기 전까지 접속 불가
back_log = 100                              # max_connections 이상의 connection이 대량으로 몰릴 때 큐에 대기가능한 커넥션의 갯수
thread_cache_size = 100                     # 재 사용을 위해 보관할 쓰래드 수, thread_created가 높을 경우 증가됨
                                            # THREADS_CONNECTED 상태값의 피크보다 약간 낮게 설정하는 것을 권장함
wait_timeout = 28800                        # 접속한 후 쿼리가 들어올 떄까지 대기하는 시간(초) = noninteractive 커넥션 닫기까지의 시간
lock_wait_timeout = 28800                   # metadata lock을 획득하기 위해 대기하는 시간(초), 기본은 1년임
interactive_timeout = 3600                  # "mysql>"과 같은 콘솔이나 터미널 상에서 클라이언트의 접속을 시간(초), 기본 8시간이지만 1시간 설정 권장
connect_timeout = 10                        # mysqld 데몬이 클라이언트로 부터 접속요청을 받는 경우 기다리는 시간(초)

#net_retry_count = 10                       # 통신이 잘못되어 실패할 때, 몇 번까지 재시도할지
net_read_timeout = 60                       # 커넥션으로부터 읽기가 안 된다고 판단하기 전에 데이터를 기다리는 시간(초)
net_write_timeout = 60                      # 커넥션으로 쓰기가 안 된다고 판단하기 전에 기다리는 시간(초)

open_files_limit = 3000                     # mysql이 오픈할수 있는 file(정확히는 file descripter)개수
                                            # 가능하면 5000으로 설정하는데 OS limit에 따라 재조정 될수 있다
                                            # 실제로는 이 값에 영향을 받지 않고, OS의 nofile(open files) 제한이 적용됨
table_open_cache = 4000                     # DB전체에서 오픈할 수 있는 테이블 갯수
table-definition-cache = 4000               # 캐싱해 놓을 (.frm 파일에서 추출한)테이블 정의 갯수, 테이블이 많으면 크게 설정

##---------------------------------------------------------------------------
## Author: YJ
## Thread Pool 설정 - thread_handling = pool-of-threads 일 때만 의미 있음
##---------------------------------------------------------------------------
# thread_pool_size = 4                      # 쓰레드 그룹 갯수, 기본은 CPU 갯수와 같음
# (sleep이나 wait 상태인 쓰레드 제외하고) CPU를 동시에 사용할 수 있는 쓰레드 갯수
# 리눅스나 유닉스 계열일 때만 사용되는 설정
# thread_pool_max_threads = 500             # 쓰레드풀에 들어갈 수 있는 최대 쓰레드 갯수
# thread_pool_idle_timeout = 60             # idle 상태인 쓰레드를 정리하기 전에 대기하는 시간(초)
# thread_pool_stall_limit = 500             # 쓰레드 교착 상태 검사 간격(밀리초)
# 쓰레드 갯수가 thread_pool_max_threads에 도달하면 쓰레드는 더 이상 생성되지 않는다.

# thread_pool_oversubscribe = 3             # internal 파라미터로 임의로 수정하지 않는 것이 좋음
# thread_pool_size * thread_pool_oversubscribe = DB에서 동시에 active되어 CPU를 사용할 수 있는 쓰레드 갯수

##---------------------------------------------------------------------------
## Author: YJ
## Connection 메모리 설정
##---------------------------------------------------------------------------
sort_buffer_size = 256K         # (인덱스를 사용할 수 없는) 정렬에 필요한 버퍼의 크기, ORDER BY 또는 GROUP BY 연산 속도와 관련
join_buffer_size = 256K         # 조인이 테이블을 풀스캔 하기 위해 사용하는 버퍼크기, 드리븐 테이블이 FULL SCAN할 때 사용됨
read_buffer_size = 256K         # 테이블 스캔에 필요한 버퍼크기
read_rnd_buffer_size = 256K     # 디스크 검색을 피하기위한 랜덤 읽기 버퍼크기, 정렬 대상이 커서 two pass 알고리즘을 쓸 때만 사용

#thread_stack = 256K            # 쓰레드 하나의 스택 사이즈 (기본 64bit 시스템의 기본 256KB)

net_buffer_length = 16K         # 클라이언트에 보내는 초기 메시지의 바이트 수
max_allowed_packet = 16M        # 한 패킷의 최대 크기
group_concat_max_len = 32M      # GROUP_CONCAT() 함수를 사용할 때 이용할 수 있는 최대 크기

max_heap_table_size = 32M       # MEMORY 테이블의 최대 크기
tmp_table_size = 1M             # 메모리에 생성될 임시 테이블의 최대 크기, 이 값을 초과하면 디스크에 임시 테이블을 씀

##---------------------------------------------------------------------------
## Author: YJ
## 쿼리 캐시 설정
##---------------------------------------------------------------------------
query_cache_size = 32M          # 쿼리 결과를 캐싱하기 위해 할당하는 메모리 크기 (DB전체)
query_cache_limit = 2M          # 쿼리 결과가 이 값보다 크면 캐싱 안 함 (기본은 1M)
query_cache_type = DEMAND       # 쿼리에서 힌트로 쿼리 캐시를 사용하겠다고 설정한 경우에만 쿼리 캐시 사용
                                # 0 or OFF : 쿼리 캐시 사용 안 함, 쿼리 캐시를 안 쓰려면 query_cache_size도 0으로 설정해야 함
                                # 1 or ON : SQL_NO_CACHE를 설정하지 않은 모든 쿼리의 결과를 캐싱함
                                # 2 or DEMAND : SQL_CACHE로 설정한 쿼리의 결과만 캐싱함

##---------------------------------------------------------------------------
# Author: YJ
# MariaDB 에서 사용할 수 있는 최대 메모리 사이즈
# innodb_buffer_pool_size + innodb_additional_mem_pool_size + innodb_log_buffer_size + key_buffer_size + query_cache_size
# + max_connections * ( read_buffer_size + read_rnd_buffer_size + sort_buffer_size + join_buffer_size + thread_stack + binlog_cache_size)
##---------------------------------------------------------------------------

##---------------------------------------------------------------------------
## Author: YJ
## InnoDB 설정
##---------------------------------------------------------------------------
#innodb_page_size = 16K
#innodb_use_sys_malloc = ON                            # OS에서 제공되는 메모리 할당기능 사용 여부, ON: InnoDB에서 OS 자원을 사용
                                                       # InnoDB의 메모리 할당기능과 OS에서 제공되는 메모리 할당 기능 중 더 효율이 높은 쪽을 선택할 수 있음
innodb_buffer_pool_size = 512M                         # InnoDB 엔진으로 된 테이블과 인덱스를 캐시하기 위한 메모리 버퍼 크기
                                                       # 초기 시스템 전체 물리 메모리의 40% 수준으로 설정하고 사용량에 따라 증감
innodb_buffer_pool_instances = 2                       # 버퍼풀의 갯수, 적절한 갯수로 나누면 뮤텍스(mutex) 경합이 줄어들어 DB 동시 처리 성능을 높여줌
                                                       # 각각의 버퍼풀은 각각의 플러쉬 리스트 뮤텍스(mutex)를 가짐 (아마 LRU리스트도 가질 듯)
                                                       # 각 버퍼풀은 InnoDB 엔진이 자동으로 적절히 배분해서 사용함
#innodb_additional_mem_pool_size = 16M                 # DEPRECATED됨, 데이터 디렉토리 정보와 내부 데이타 구조를 저장하는 메모리 풀의 크기

innodb_data_file_path=ibdata1:32M;ibdata2:32M:autoextend # 시스템테이블스페이스 - 파일명:초기크기:자동증가:최대크기
innodb_file_per_table = 1                              # 테이블 단위로 테이블스페이스 할당, 활성시 테이블별로 .frm, .ibd 각각 생성
innodb_data_home_dir = /data001/mysvc01/MARIASVC       # 테이블 생성 기본 경로
#innodb_autoextend_increment = 100                     # 테이블스페이스 자동 확정시 크기

innodb_log_buffer_size = 4M                            # 로그(redo) 버퍼 크기
                                                       # 클수록 디스크 사용량이 줄어서 성능이 향상되지만 시스템 다운시 손실되는 트랜잭션 양도 증가됨
                                                       # 크기가 작으면 로그버퍼를 로그파일로 쓰기 위한 부하가 많이 발생할 수도 있음
innodb_log_group_home_dir = /data001/mysvc01/MARIASVC  # 로그(redo) 경로
innodb_log_files_in_group = 3                          # 로그(redo) 파일 갯수
innodb_log_file_size = 64M                             # 로그(redo) 파일 크기
                                                       # 일반적으로 (innodb_buffer_pool_size/innodb_log_files_in_group)를 적정 값으로 본다.

innodb-support-xa = OFF                                # 트렌젝션 two-phase commit 지원, 디스크 플러시 횟수를 줄여 성능항상
                                                       # 분산데이터 기능 (2-PhaseCommit)

innodb_buffer_pool_dump_at_shutdown = 1                # DB shutdown할 때 innodb_log_buffer에 있던 내용을 dump 파일로 내림
innodb_buffer_pool_filename = innodb_buffer_pool_dump  # DB shutdown할 때 innodb_log_buffer에 있던 내용을 담을 dump 파일명
innodb_buffer_pool_load_at_startup = 1                 # DB startup할 때 dump파일로 받아 놨던 내용을 innodb_log_buffer에 올림

innodb_thread_concurrency = 4             # InnoDB가 동시 사용가능한 최대 시스템 쓰래드 수
                                          # CPU의 2~4배 권장, 0으로 설정하면 동시성이 비활성화 됨
#innodb_thread_sleep_delay=0              # InnoDB queue에 들어가기전에 얼마나 sleep할것인가
                                          # innodb_thread_concurency에 도달하면 새로운 쓰레드는 innodb_thread_sleep_delay 동안 Sleep 함
                                          # innodb_thread_concurency = 0 이면 이 값음 무시됨
#innodb_adaptive_max_sleep_delay = 150000 # 0 이상의 값으로 지정하면, InnoDB가 innodb_thread_sleep_delay를 자동으로 조정
#innodb_concurrency_tickets = 500         # 한번 스케줄링된 쓰레드는 설정된 티켓개수만큼 자유롭게 InnoDB를 사용할수 있다
                                          # 여러 쓰레드가 innodb_thread_concurrency에 도달하면 하나의 쓰레드만 큐에 들어갈 수 있음
                                          # 하나의 쓰레드가 InnoDB에 들어가게 되면, innodb_concurrency_tickets의 값과 일치하는 “자유 티켓”의 숫자가 주어지고,
                                          # 쓰레드가 자신의 티켓을 사용하기 전 까지는 자유롭게 InnoDB에 들어가고 나올 수가 있다.
                                          # 이런 후에는, 쓰레드는 다시금 일관성 검사를 하고 InnoDB에 다시 들어가려고 시도하게 된다

# InnoDB는 IO request를 background threads에 가능한한 동등하게 분배하고, 동일한 extent에 대한 read requests는 동일한 thread에게 할당함
innodb_read_io_threads = 4           # InnoDB 읽기 작업을 위한 I/O 쓰레드의 수, 주목적: read-ahead requests
                                     # SHOW ENGINE INNODB STATUS 에서 pending read requests가 64 x innodb_read_io_threads이상이라면,
                                     # innodb_read_io_threads를 더 할당하는 것을 고려
innodb_write_io_threads = 4          # InnoDB 쓰기 작업을 위한 I/O 쓰레드의 수
# read-ahead 란?
# 하나의 extent(64개 pages group)을 모두 buffer pool에 prefetch하는 작업. (asynchronous request임)
# 이들 페이지도 곧 읽혀질거라는 가정하에 모두 버퍼에 올리는 것
# 알고리즘)
# linear read-ahead technique: 버퍼풀 안에 순차적으로 읽혀진 페이지 개수로 판단
#                              만약 하나의 extent내에서 순차적으로 읽혀진 페이지 개수가 innodb_read_ahead_threshold 이상이면 다음 extent전체 페이지를 read-ahead
# random read-ahead technique: 버퍼풀 안에 존재하는 페이지 개수로 판단(순차적인지 여부와 무관함)
#                              만약 한 extent내의 13개의 연속된 페이지가 버퍼풀에 존재한다면, 해당 extent의 나머지 pages들을 read-ahead한다

innodb_lock_wait_timeout = 1200      # 트랜잭션 락(record lock)을 대기하는 시간(초)

#innodb_flush_neighbors = 1          # InnoDB 버퍼풀에서 페이지 플러시를 할 때(=디스크로 기록할 때), 인접한 더티 페이지도 (단일 I/O로) 플러시할 지 결정하는 변수
                                     # 랜덤액세스 쓰기 성능이 떨어지는 HDD에서는 좋으나, SSD에서는 비활성화하는 것이 성능에 유리함
                                     # 0: 해제, 1: 같은 extent안에 연속된 더티 페이지를 같이 플러시함, 2: 같은 extent안에 모든 더티 페이지를 플러시함

#innodb_io_capacity = 100            # 백그라운드 플러싱 속도 제어를 위한 변수, 큰 값을 지정하면 I/O 대역폭을 점유하므로 환경에 맞춰서 설정할 것
                                     # InnoDB 메인 쓰레드가 I/O 작업을 할 수 있는 capa, 시스템의 I/O 수준에 의존적임
                                     # 일반적으로 7200 RPMs 하드 드라이브인 경우 100으로 설정
                                     # RAID 구성이나 SSD 사용 등에 따라서 더 높은 값으로 설정
                                     # Raid1: 200. Raid10: 200 x write arrays. SSD: 5000. FusionIO: 20000

innodb_flush_log_at_trx_commit = 0   # InnoDB에서 커밋될 때마다 로그(redo)를 디스크에 플러시할지를 결정하는 옵션
# fsync() 함수를 호출하는 빈도에 관한 옵션
# 0 : 커밋될 때마다 디스크 플러시를 하지는 않음, OS에서 적절한 시점(일반적으로 4~5초 간격)마다 데이터 동기화를 처리하게 됨
#     잘 못 되면 4~5초간의 데이터는 유실될 수도 있음
# 1 : 트랜잭션이 커밋될 때마다 로그 파일에 기록되고 디스크 플러시가 실행 (가장 안전, 가장 느림)
# 2 : 커밋되면 강제로 로그 버퍼를 로그 파일에 쓰지만, 1초가 지나기 전에는 디스크에 저장되지 않음

innodb_flush_method = O_DIRECT
# InnoDB가 dafa files, log files로 data를 flush(디스크에 기록하고 동기화하는 작업)하는 방법
# ------------------+----------+----------+-----------+-----------------+-----
# Method            | log file | log file | data file | data file flush | 설명
# Method            | open     | fulsh    | open      | data file flush | 설명
# ------------------+----------+----------+-----------+-----------------+-----
# fsync             | normal   | fsync()  | normal    | fsync()         | 기본
# O_DSYNC           | O_SYNC   | O_SYNC   | normal    | fsync()         | synchronized(동기) I/O로서, write작업시 hardware단까지 fsync함
# O_DIRECT          | normal   | fsync()  | O_DIRECT  | fsync()         | OS caching을 하지 않고 direct I/O로 innodb_buffer_pool에서 file로 I/O함
# O_DIRECT_NO_FSYNC | normal   | fsync()  | O_DIRECT  | skip fsync()    | O_DIRECT와 동일한데 data file 동기화를 위한 fsync 호출을 생략함
# ------------------+----------+----------+-----------+-----------------+-----
# fsync = 데이터와 메타정보를 함께 변경하는 방식 (파일메타정보는 파일변경일시,수정자 등을 의미함, fdatasync "데이터만 변경, 메타데이터는 무시")
# O_DIRECT = pache cache, buffer cache는 directly하게 write bypass하지만, inode cache, directory cache, metadata는 따로 fsync()를 호출해서 flush 해줘야 함
#            (캐시메모리 장착된)RAID 컨트롤러가 없거나 SAN을 사용할 때는 O_DIRECT를 사용 하지 않는 것이 좋음
#            double buffering(InnoDB buffer pool과 OS file system cache에 두번 캐쉬)을 하지 않기 떄문에 성능향상을 기대할 수 있다.
# O_DIRECT_NO_FSYNC = 몇몇 file system에서는 O_DIRECT가 fsync()없이도 metadata까지 synchronize되는 걸 보장함. 그래서 InnoDB가 O_DIRECT_NO_FSYNC를 추가함

# 디스크에 데이터를 쓰는 방법 = 1단계 "운영체로의 버퍼로 기록" + 2단계 "버퍼의 내용을 디스크로 복사"
#   - 동기(Sync) I/O = 1단계와 2단계를 함께 실행
#   - 비동기(Async) I/O = 1단계와 2단계를 다른 시점에 실행
#   - direct I/O = 1단계 무시, 2단계 "버퍼의 내용을 디스크로 복사"만 실행

innodb_adaptive_hash_index = ON
# Adaptive Hase Index
# 1. workload와 충분한 buffer pool memory의 적절한 조합하에서, 트랜잭션 특성이나 신뢰성에 위배되지 않는 선에서, InnoDB를 in-memory DB처럼 동작하게 함
# 2. 동작
# 1) MySQL은 search 패턴을 고려하여 index prefix(인덱스 키의 값 앞부분)로 hash index를 만든다
# 2) 자주 access되는 인덱스 페이지에 대해서만 부분적으로 생성될 수도 있다.
# 3) InnoDB는 index search 패턴을 모니터링하는 메커니즘을 가지고 있어서 해당 쿼리가 hash index를 사용하면 이익이라고 판단되면, 자동으로 hash index를 생성한다
# 4) 만약 테이블 전체가 메모리에 들어갈수 있는 사이즈인 경우, hash index는 쿼리 속도를 향상시킨다.
#    인덱스를 pointer와 같이 동작하게 해서 원하는 로우를 바로 다이렉트하게 찾을수 있다.
# 5) 자주 사용되는 데이터는 해시를 통해서 직접 접근할 수 있기에, Mutex Lock으로 인한 지연은 확연하게 줄어듦
# 6) heavy workload하에서는(동시 대량 배치 작업 등), adaptive has index를 접근할때 획득하는 read/write lock이 contention의 원인이 되기도 한다
# 7) LIKE % 쿼리의 경우에는 Adaptive Hase Index가 별 이득이 안 된다
# 3. 모니터링
# 1) 할당되는 메모리는 Innodb_Buffer_Pool_Size의 1/64만큼으로 초기화(최소가 그렇고 최대는 알 수 없음)
#    지나치게 커지지 않도록 상태의 주기적 확인 필요 (SHOW GLOBAL STATUS LIKE 'Innodb%adaptive%';)
# 2) SHOW ENGINE INNODB STATUS 에서 SEMAPHORE 섹션에 RW-latch를 대기하는 thread가 여러개 있다면, disable하는 것이 더 좋을 수도 있다.
# 3) 테이블 DROP은 최대한 트래픽이 없는 새벽에, Adaptive Hash Index를 순간 OFF/ON을 하여 메모리를 해제하고, 테이블을 DROP하는 것이 좋다.

innodb_adaptive_hash_index_partitions = 2
# adaptive_hash_index를 몇 개로 나눠쓸지 결정하는 변수
# 기본은 1 이며, 1일 때는 단일 Mutex로 관리되기 때문에 테이블을 DROP하게 되면 adaptive_hash_index에서 관련 정보를 정리하려고 하면서
# adaptive_hash_index 덕을 보던 쿼리들까지 영향을 받을 수 있음
# 변수값을 크게 설정하면 Mutex가 여러 개가 되면서 테이블을 DROP할 때 adaptive_hash_index에서 Mutex 경합으로 인해 발생할 수 있는 문제를 줄일 수 있음
# InnoDB 내부적으로는 테이블 DROP시 Sleep없이 죽으라고 Hash Index에서 관련 노드를 모두 삭제한 후 테이블이 제거
# 개인적인 생각으로는 CPU 개수 정도면 적당할 듯 함

#innodb_change_buffering = all       # change buffering 설정
# change buffering = insert buffering + delete buffering + purge buffering
# all : 기본: buffer inserts, delete-marking operations, and purges.
# none : Do not buffer any operations.
# inserts : Buffer insert operations.
# deletes : Buffer delete-marking operations.
# changes : Buffer both inserts and delete-marking.
# purges : Buffer the physical deletion operations that happen in the background.
# Innodb는 인덱스 leaf node를 업데이트하지 않고 buffer만 해둠, 버퍼에 임시로 저장해 두고 나중에 여유가 될 때 실제 인덱스에 병합함
# secondary index의 leaf node를 update하려면, 디스크로부터 index page를 읽어서 변경해야하는데 이는 부수적으로 추가 IO가 필요한 작업이기 때문
# 저장: change buffer는 system tablespace에 위치함
# 조건: non-unique한 인덱스에 대한 변경사항 저장, 변경작업에 해당하는 page가 buffer pool에 존재하지 않을때만 change buffer에 변경을 저장
# merge 작업)
# background thread에 의한 주기적으로 병합
# 해당 page가 다른 read operation에 의해서 buffer pool로 불려읽혀졌을 때

#innodb_change_buffer_max_size=25    # 버퍼풀에서 change_buffer가 차지할 비율

#innodb_old_blocks_pct = 37          # LRU 리스트 영역의 범위(퍼센트)
#innodb_old_blocks_time = 1000       # LRU 리스트에서 MRU 리스트로 옮기기 전에 대기하는 시간(밀리초)
# MRU: Most Recently used list, LRU: Last Recently used list
# 버퍼풀의 페이지를 관리하는 리스트 = MRU 리스트 + LRU 리스트

innodb_autoinc_lock_mode = 1
# auto_increment 칼럼에 들어갈 값을 위한 lock 설정
# 0 : insert 할 때 마다 auto increment lock 사용, insert ... select ... 처럼 대량 데이터 입력할 때는 lock 대기가 길어짐
# 1 : insert ... select ... 처럼 대량 데이터 입력할 때 미리 일정량의 자동 증가값을 만들어 사용
#     미리 만든 일정량의 자동 증가값이 다 사용되지 않으면 나머지는 버림
# 2: auto increment lock을 사용하지 않고 mutex 사용, auto_increment 값이 유니크함은 보장하지만 순서는 보장하지 못 함

#innodb_max_dirty_pages_pct=75       # 버퍼풀에 남아 있을 수 있는 더티 페이지의 비율 (이 비율이 넘어가면 체크포인트가 수행됨)
                                     # 더티페이지(dirty page) = SQL 조작으로 변경됐지만 아직 디스크에 쓰여지지 않은 데이터 페이지
#innodb_adaptive_flushing=ON         # InnoDB 엔진이 리두 로그의 발생량을 모니터링 하면서 버퍼 풀의 더티페이지를 디스크로 쓰는 작업 속도를 조절하게 함
                                     # ON 이 아니면 더티페이지의 비율이 innodb_max_dirty_pages_pct를 넘어서는 순간 공격적인 디스크 쓰기 일어날 수 있음
#innodb_use_native_aio=ON            # 리눅스와 윈도우 플랫폼에 한해 네이티브 비동기 I/O 방식이 제공됨 (I/O요청 동시성 증대 효과)
                                     # libaio 라이브러리가 설치되어 있고, 이 값을 "ON"으로 설정해야 사용 가능함

innodb_doublewrite = 1               # doublewrite buffer와 data file에 이중 쓰기 활성화 (기본: 활성)
# 목적: 시스템 crash, 전원공급중단 등 장애시 보다 안전한 리커버리
#       OS의 기본IO 단위(보통 4K)와 DB의 기본IO단위(보통 16K)가 다름으로 인해 발생할 수 있는 page currupt를 방지하기 위해 사용
#       (16K가 OS를 통해 다 써지기 전에 시스템 crash가 가 되도, 안전하게 복구할 수 있도록 도와줌)
#       InnoDB는 full pages를 로깅하지는 않으므로 필요함
#       InnoDB는 log file에 page number, 변경내용, log sequence 정보를 기록함
# Doublewrite Buffer 는?
# 1. 기본적으로 system tablespace에 위치함
# 2. Flush 이벤트 발생시 Doublewrite Buffer를 먼저 쓰고, 그 다음에 대상 페이지의 내용을 변경함
#    (대상 페이지의 변경 작업은 fsync()를 call해서 진행됨)
# 3. Doublewrite Buffer에 기록되는 내용은 해당 페이지 정보와 operation 정보임
# 4. 여러 개의 dirty page를 각각의 데이터파일에 플러쉬하려면 랜덤I/O가 발생하여 시간이 오래 걸리므로
#     dirty page를 모아서 시스템 테이블스페이스 내 하나의 연속적인 extent에 쓰고 단일 I/O로 처리
# 5. fsync() 횟수 줄임 - 매 page마다 fsync()를 콜하는게 아니라, multiple page를 한번에 쓰고 fsync()
# 6. 일반적으로 doublewrite를 활성화에 의해서 발생하는 성능 저하는 5% 정도로 본다.

#innodb_sync_spin_loops = 30         # 쓰레드가 지연되기 전에 (suspended) 풀어 주기 위해 InnoDB 뮤텍스(mutex)를 기다리는 쓰레드의 대기 시간
                                     # spin loop: CPU를 사용하면서 락이 해제됐는지 검사하는 것
                                     # 동일한 쿼리가 동시다발적으로 유입되어 여러 스레드에서 메모리내의 같은 데이터 블록에 접근하여 뮤텍스 경합이 발생,
                                     # CPU 부하가 높아지는 경우에는 이 값을 줄여가면 부하가 줄어들 수도 있음 (10정도까지는 괞찮을 듯)

#innodb_table_locks = 1              # LOCK TABLES은 AUTOCOMMIT=0경우에, InnoDB로 하여금 내부적으로 테이블을 잠금
#innodb_max_purge_lag = 0            # 퍼지 연산 (purge operation)이 래깅(lagging)될 때 INSERT, UPDATE 및 DELETE 연산을 지연 시키는 방법을 제어
                                     # 디폴트값 0일시 지연 없음

#innodb_commit_concurrency = 0       # 동시에 commit 처리를 할 수 있는 쓰레드의 숫자. 값이 0이 되면 동시성 제어(concurrency control)가 비활성화

#innodb_purge_threads = 1            # purge 작업을 실행할 쓰레드의 수 (기본1~최대32)
# InnoDB의 purge 작업
# 예전) 주기적으로 수행되는 가비지 컬렉션 작업의 한 종류, 마스터 쓰레드에 의해 동작됨, purge하는 동안 다른 데이터베이스 작업들은 대기해야 함
# MySQL 5.5이후) 개별의 쓰레드에서 수행되면서 더 높은 동시성 보장

innodb_file_format = barracuda       # InnoDB 파일 포멧: 테이블압축 등의 기능을 사용하려면 barracuda 사용
innodb_file_format_max = barracuda
innodb_large_prefix = ON             # 인덱스 키 칼럼의 prefix를 767 bytes 이상으로 설정 (최대 3072 bytes까지 설정 가능)
innodb_open_files = 4000             # DB전체에서 동시에 열어 놓을 수 있는 InnoDB 테이블의 .ibd 파일의 수

#innodb_stats_persistent = 1 (ON)    # 통계정보를 주기적으로  mysql.innodb_table_stats, mysql.innodb_index_stats 테이블에 영구히 저장
#innodb_stats_auto_recalc = 1 (ON)   # 주기적으로 통계 정보를 갱신
#innodb_stats_persistent_sample_pages = 20 # mysql.innodb_table_stats, mysql.innodb_index_stats 테이블에 영구히 저장할 통계정보 수집에 사용할 샘플 페이지 수
#innodb_stats_sample_pages = 8       # 통계정보 수집에 사용할 샘플 페이지 수
#innodb_stats_on_metadata = OFF      # 다음 명령들이 실행될 때 통계 정보 갱신 활성화
                                     # SHOW TABLE STATUS, SHOW INDEX, INFORMATION_SCHEMA.TABLES 조회, INFORMATION_SCHEMA.STATISTICS 조회

innodb_show_verbose_locks = 1        # "SHOW ENGINE INNODB STATUS"에 락이 잡힌 레코드 표시
innodb_print_all_deadlocks = ON      # 에러 로그에 InnoDB 데드락 정보 기록 활성화

#innodb_status_output = ON;          # 에러 로그에 "SHOW ENGINE INNODB STATUS" 결과 포함 설정
innodb_status_output_locks = ON      # InnoDB Status를 보는 부분("SHOW ENGINE INNODB STATUS" 혹은 에러로그)에 lock 정보도 함께 표시되도록 함

#innodb_force_recovery = 0
# 크래시 복구 모드 설명 : 큰 값은 작은 값의 내용을 포함함
# 1 (SRV_FORCE_IGNORE_CORRUPT) 서버가 깨진 페이지를 발견한다고 하더라도 계속 구동하도록 만듦
# 2 (SRV_FORCE_NO_BACKGROUND) 메인 쓰레드가 구동되지 못 하도록 함
# 3 (SRV_FORCE_NO_TRX_UNDO) 복구 다음에 트랜젝션 롤백을 실행하지 않음
# 4 (SRV_FORCE_NO_IBUF_MERGE) 삽입 버퍼 병합 연산 (insert buffer merge operations)까지 금지
# 5 (SRV_FORCE_NO_UNDO_LOG_SCAN) 데이터베이스를 시작할 때 UNDO log를 검사하지 않음
# 6 (SRV_FORCE_NO_LOG_REDO) 복구 연결에서 로그 롤-포워드 (roll-forward)를 실행하지 않음

##---------------------------------------------------------------------------
## Author: YJ
## MyISAM 스토리지 엔진 관련 설정
## InnoDB를 사용하지 않고 MyISAM만 사용한다면 key_buffer_size를 크게 설정
##---------------------------------------------------------------------------
key_buffer_size = 16M                  # MyISAM 테이블이 거의 없고, 데이터도 매우 적으므로 아주 작게 설정
bulk_insert_buffer_size = 1M
myisam-recover-options = BACKUP,FORCE  # MyISAM 테이블을 열 때 자동 복구 옵션
myisam_sort_buffer_size = 1M           # 인덱스 정렬시 할당되는 버퍼의 크기
myisam_max_sort_file_size = 64M        # 인덱스 재 생성시 사용할 임시 파일의 최대 크기
#myisam_repair_threads = 1             # 정렬 복구시 사용될 쓰레드 갯수
#ft_min_word_len                       # MyISAM 혹은 InnoDB 테이블 FULLTEXT 인덱스를 만들 때 포함될 단어의 최소 길이 (mgroonga와는 관련 없는 설정)
                                       # 이 값을 변경하면 "REPAIR TABLE 테이블이름 QUICK" 으로 재 구축해야함

##---------------------------------------------------------------------------
## Author: YJ
## Aria 스토리지 엔진 관련 설정
## internal temporary table이 생성될 때는 기본적으로 Aria 스토리지 엔진을 사용하므로 지나치게 작게 설정하지 말 것
## 예: aria_pagecache_buffer_size = 1M
##---------------------------------------------------------------------------
aria_pagecache_buffer_size = 32M
aria_sort_buffer_size = 32K
aria_log_file_size = 64M


##---------------------------------------------------------------------------
## Author: YJ
## 통계 및 Optimizing 관련 설정
##---------------------------------------------------------------------------
use_stat_tables = NEVER                 # 스토리지 엔진 통계 정보와 통합 통계 정보를 이용하는 우선순위를 결정
# NEVER: 스토리지 엔진 통계정보만 수집
# COMPLEMENTARY : 스토리지 엔진 통계정보를 우선 사용하고 정보가 부족하면 통합 통계 정보 사용
# PREFERABLY: 통합 통계정보를 우선 사용 사용하고 정보가 없으면 스토리지 엔진 통계 정보 사용
# 통합 통계정보란? mysql.table_stat, mysql.column_stat, mysql.index_stat

histogram_size = 20                    # 히스토그램을 저장할 공간 크기(bytes단위), 히스토그램 정보는 mysql.column_stat 저장
# 0 ~ 255 까지 설정 가능, 0이면 히스토그램 수집 안 함
# MariaDB는 Height-Balanced Histogram 알고리즘 사용, 버킷에 저장된 최대값을 1byte 할당해서 저장
histogram_type = SINGLE_PREC_HB         #
# SINGLE_PREC_HB : histogram_size   만큼 버킷 생성
# DOUBLE_PREC_HB : histogram_size/2 만큼 버킷 생성 (버킷당 2byte를 사용하는 대신 정확성을 확대했기 때문)

#optimizer_prune_level = 1               # 조인 순서 결정 알고리즘 선택 (1: Greedy 방식, 2: Exhaustive 방식)
optimizer_search_depth = 20             # Greedy 방식에서 쿼리에 있는 테이블 중 몇개 테이블의 조인 순서 최적화를 찾을 지 결정 (기본 62)
optimizer_use_condition_selectivity = 4 # 옵티마이저 선택도(1~5)
# 1: MariaDB 5.5 버전에서 사용하던 선택도 예측 방식을 유지(디폴트 값)
# 2: 인덱스가 생성된 칼럼의 조건에 대해서만 선택도 판단
# 3: 모든 칼럼의 조건에 대해서 선택도 판단(히스토그램 사용 안함)
# 4: 모든 칼럼의 조건에 대해서 선택도 판단(히스토그램 사용)
# 5: 4에 추가적으로 범위 검색이 아닌 조건에 대해서는 샘플링 정보를 이용해 선택도를 판단

userstat = ON                           # Enable INFORMATION_SCHEMA.%_STATISTICS tables


##---------------------------------------------------------------------------
## Author: YJ
## Binary Logs
##---------------------------------------------------------------------------
server_id = 1

# Binary Log 설명
# 1. 써지는 시점
# 1) 트랜잭션을 지원하는 스토리지 엔진(예: InnoDB)
#    commit 된 후 lock이 해지 되지 않은 상태에서 쿼리를 로깅
#    commit 전에는 쿼리 정보가 cache되고 commit 될 때 모든 쿼리 정보가 로깅됨
# 2) 트랜잭션을 지원하는 않는 스토리지 엔진(예: MyISAM)
#    쿼리 실행 직후 바로 로깅됨
#    트랜잭션 안에 트랜잭션을 지원하지 않는 테이블이 섞이면, 트랜잭션이 롤백되도 그 테이블의 데이터는 롤백 안 됨
# 2. 활성화 방법
# log_bin 설정

log_bin = /data001/mysvc01/binary_MARIASVC/mysvc01-bin  # binary log 경로

#binlog_cache_size = 256K                            # 쓰레드 별로 binary logging과 관련된 내용을 저장하기 위한 캐시 사이즈로 트랜잭션 지원 구문만을 위해 사용됨
                                                     # 큰 다중문 트랜잭션을 번번히 사용한다면 이 사이즈를 크게 잡아서 퍼포먼스를 개선할 수 있음
                                                     # 최대 사이즈: max_binlog_cache_size로 설정가능
#binlog_stmt_cache_size = 32K                        # 쓰레드 별로 binary logging과 관련된 내용을 저장하기 위한 캐시 사이즈로 트랜잭션 지원하지 않는 구문만을 위해 사용됨
                                                     # 최대 사이즈: max_binlog_stmt_cache_size로 설정가능

#binlog_checksum = NONE                              # NONE: binary log의 이벤트가 제대로 작성됐는지 각각의 이벤트 길이를 체크해서 확인

max_binlog_size = 256M                               # binary log file 최대 크기

binlog_format = ROW                                  # binary log에 기록할 데이터 유형
# transaction_isolation이 "READ-COMMITTED" 이상이면 "MIXED" 이상으로 설정해야 함
# STATEMENT: 명령문 기록
# MIXED : 몇몇 일관성을 보장하지 못 하는 경우에는 ROW 포멧으로, 그 외에는 STATEMENT 포멧으로 기록
# ROW: 실제 레코드 기록

sync_binlog = 0                                      # DB의 binary log 동기화 빈도 설정
# 0: binary log를 기록하지만 직접적으로 플러시(동기화)를 실행하지 않고, OS에 맡김 (리눅스 계열은 3~5초 간격으로 자동 플러시함)
# 1: binary log의 쓰기가 발생할 때마다 디스크 동기화 수행
#    binary log 손실은 없지만 잦은 디스크 I/O로 느려질 수 있음
# 1 이상의 값: 설정된 횟수만큼 binary log 쓰기가 발생할 때마다 DB가 binary log 파일의 동기화를 실행
#              설정된 값이 클수록 손실될 수 있는 binary log의 양이 많아지고 binary log의 쓰기 성능은 좋아짐

expire_logs_days = 1                                 # binary log 보관기간(일), 이 기간이 지나면 자동 삭제
log_bin_trust_function_creators = 1                  # Routine 생성자 신뢰, replication 환경에서는 이 설정을 해야만 Routine 생성이 가능함
#binlog-annotate-row-events = ON                     # 주석도 binary log에 남도록 처리

#sql_log_bin = 0
# mysqld에 적용되는 시스템변수는 아니고, 쓰레드레벨에서 설정할 수 있는 값임
# 해당 쓰레드에서 binary log가 안 남게 하고 싶을 때는 0으로 설정 가능, SUPER 권한 필요함

##---------------------------------------------------------------------------
## Author: YJ
## 슬레이브(Slave) 설정 - replication 환경에서 slave일 때만 의미 있음
##---------------------------------------------------------------------------
#relay_log = /logs001/mysvc01/MARIASVC/relay         # 릴레이 로그 경로
#relay_log_purge = TRUE
#read_only                                           # 일기 전용 DB로 설정


##---------------------------------------------------------------------------
## Author: YJ
## 슬레이브(Slave)이면서 마스터(Master)인 경우
##---------------------------------------------------------------------------
#log-slave-updates                                   # 현재 복제되는 쿼리를 바이너리 로그에 저장

##---------------------------------------------------------------------------
## Author: YJ
## mysqld_safe 데몬에만 적용되는 설정
##---------------------------------------------------------------------------
[mysqld_safe]
log-error=/logs001/mysvc01/MARIASVC/error/mysqld.err    # 에러로그 파일경로
pid-file = /engn001/mysvc01/MARIASVC/mysqld.pid         # 프로세스 ID 파일경로
socket = /engn001/mysvc01/MARIASVC/mysqld.sock          # 소켓파일 경로
nice           = 0


##---------------------------------------------------------------------------
## Author: YJ
## mysqldump 툴을 이용한 DB 접속시에만 적용되는 설정
##---------------------------------------------------------------------------
[mysqldump]
max-allowed-packet    = 1G
default-character-set = 'utf8mb4'
quick                             # 버퍼를 사용하지 말고, direct로 덤프받기


##---------------------------------------------------------------------------
## Author: YJ
## myisamchk 툴을 이용한 DB 접속시에만 적용되는 설정
##---------------------------------------------------------------------------
[myisamchk]
key-buffer-size   = 10M
sort-buffer-size  = 10M
read-buffer-size  = 8M
write-buffer-size = 8M


##---------------------------------------------------------------------------
## Author: YJ
## mysql 클라이언트 툴을 이용한 DB 접속시에만 적용되는 설정
##---------------------------------------------------------------------------
[mysql]
default-character-set = 'utf8mb4'
no-auto-rehash                     # 자동 완성 기능 비활성화
local-infile = ON                  # local file을 이용한 LOAD DATA 작업이 가능하게 함
enable-secure-auth                 # 서버로 구버전(4.1버전 이하) 포멧으로 된 패스워드 전달 비활성화
prompt=(\U){\h}[\d]\_\R:\m:\\s>\_  # SQL 프롬프트 설정
pager=less -n -i -F -X -E          # 데이터 출력시 페이징처리
show-warnings                      # 경고 발생시 메세지 자동 출력
#safe-updates                      # 데이터 변경 또는 삭제시 where절을 필수로 갖도록 처리
#i-am-a-dummy


##---------------------------------------------------------------------------
## xtrabackup (innobackupex) 툴을 이용한 DB 접속시에만 적용되는 설정
##---------------------------------------------------------------------------
[xtrabackup]
default-character-set = 'utf8'
# clientlib 5.1로 xtrabackup binary가 build된 경우, 해당 lib에는 utf8mb4가 없어서 아래와 같은 오류가 발생할 수 있음
# 오류내용: "Can't initialize character set utf8mb4"
# lib 5.5로 xtrabackup을 다시 컴파일하면 문제가 없지만 workaround로 위와 같은 옵션을 설정해도 됨
# 위 설정은 특별한 의미는 없으며 lib 5.1에는 utf8이 있기 때문에 오류가 발생하진 않음


##---------------------------------------------------------------------------
## Author: YJ
## 모든 클라이언트 툴을 이용한 DB 접속시에 적용되는 설정
##---------------------------------------------------------------------------
[client]
port   = 3306
socket = /engn001/mysvc01/MARIASVC/mysqld.sock
default-character-set=utf8mb4

ㅇ
[파이썬을 이용한 머신러닝, 딥러닝 실전 개발 입문]에서는 머신러닝의 바탕이 되는 데이터를 수집하고, 수집된 데이터를 기반으로 머신러닝을 수행하는 방법을 설명합니다. 인터넷에서 데이터를 어떻게 효율적으로 수집하는지 알아보고, 머신러닝을 원활하게 할 수 있게끔 데이터를 가공하는 방법을 살펴봅니다. 나아가 가공된 데이터를 이용해 챗봇 제작, 규동 메뉴 이미지 판정, 얼굴 인식 등 머신러닝에 활용하는 과정까지 실질적인 파이썬 예제 코드로 소개합니다.

=================================================================
좋은책을 발견했다.
요즘 관심이 생긴 [마르코프 체인] 에 대한 지식이 필요했는데 파이썬에 여러 기능을 한번에 공부 할수 있는 귀한책이다.
요즘 분위기상 일본책 보고 있으면 매국놈 소리 들을수 있지만. 뭔가 잘쓴 책이다 싶으면 일본인이 저자다.
다음주에 구입 예정이다.
네이버 가격비교 : [링크]
=================================================================
출처 : 위키북스
사이트 품질 가이드
1. 사이트 품질 가이드에서 다룰 내용
2. 검색 로봇 수집
3. 콘텐츠 관리
4. 사이트 구조
5. 사이트 활성화
1. 사이트 품질 가이드에서 다룰 내용
-
이 품질 가이드의 목적은 사이트내의 콘텐츠가 검색 사용자의 의도에 맞게 네이버의 검색결과에 잘 노출될 수 있도록 사이트를 최적화 하고 품질을 개선하는 방법에 대한 내용을 다루고 있습니다. 가이드에서 언급하는 내용은 특정 검색엔진에 의존적인 내용이 아닙니다. 사이트를 처음 개발하거나 개편등의 작업이 있을 때 웹 표준에서 권장하는 사항만 챙긴다면 사이트를 방문하는 사용자의 콘텐츠 소비에 도움을 줄 뿐 아니라 검색엔진이 콘텐츠를 구조적으로 잘 이해할 수 있는 효과를 자연스럽게 얻을 수 있습니다.
이 가이드는 사이트가 네이버의 검색결과 상위에 노출될 수 있는지에 대한 방법에 대한 답변이 아닙니다. 모든 웹 페이지는 우선적으로 방문 사용자를 위하여 제작되어야 하며 검색엔진에만 최적화된 상태로 작성 된다면 콘텐츠 소비가 주 목적인 사용자들에게 좋은 경험을 주기가 어렵습니다.
사이트는 목적에 맞게 방문하는 사용자의 눈높이에 맞춘 품질을 지녀야 합니다. 이와 더불어 웹 표준에서 권장하는 기술적인 사항을 준수함으로서 사이트의 품질을 자연스럽게 끌어 올리는 효과를 누려보세요. 네이버 검색과 웹마스터도구가 여러분 사이트의 방문자 유입이 증가될 수 있도록 도와 드리겠습니다.
2. 검색 로봇 수집
-
검색 로봇 수집과 관련된 대표 품질 항목은 로봇룰 설정에 따른 수집 가능한 문서의 양과 올바른 XML 사이트맵과 RSS의 존재하는지 여부 입니다.
네이버 검색결과에 노출되는 사이트의 콘텐츠는 검색로봇이 사이트를 방문하여 정보를 수집, 색인과정을 처리한 뒤 로직에 따라서 반영됩니다. 그러므로 외부 사용자에게 허용할 수 있는 콘텐츠에 대하여 네이버 검색로봇이 여러분의 사이트를 인지하고 수집할 수 있도록 웹 표준으로 지정된 로봇룰을 올바르게 지정할 필요가 있습니다. 내 사이트내에서 검색에 노출할 대상인 콘텐츠와 비 노출할 콘텐츠를 분류하여 로봇룰을 작성하는 것이 매우 중요합니다.
로봇룰과 관련된 자세한 내용은 웹 표준 최적화 가이드 및 웹 표준 HTML 가이드를 참고하세요.
웹 상에서는 수억 개의 사이트가 존재하며 네이버 검색로봇이 모든 사이트의 콘텐츠를 빠른 시간내에 방문하기에는 한계가 있습니다. 사이트 내에 수집되어야할 페이지들을 네이버 검색 로봇에게 알려 줄 있는 XML 사이트맵은 검색 로봇의 수집을 도와줄 수 있는 유용한 방법입니다. 또한, 사이트 내에서 새로 생성된 신규 글에 대하여 웹 표준인 RSS 를 이용한다면 최신 콘텐츠의 검색반영을 보다 빠르게 검색로봇에게 알려줄 수 있습니다.
XML 사이트맵에 대한 자세한 내용은 웹 표준 최적화 가이드를 참고하세요.
3. 콘텐츠 관리
-
콘텐츠 관리와 관련된 대표 품질 항목은 웹 페이지의 제목 및 설명이 콘텐츠 주제를 명확하게 설명할 수 있도록 지정 되었는지 여부입니다.
사이트 제목과 설명에 대한 품질은 검색 사용자가 사이트를 잘 인지할 수 있는 매우 중요한 항목입니다. 사이트 제목과 설명이 콘텐츠를 대표할 수 있는 문구로 적용되어 사용자가 쉽게 인지할 수 있도록 작성해야 합니다. 제목과 설명이 정상적으로 적용 되었더라도 너무 길어서 한눈에 보기 어렵거나 동일한 키워드가 의미 없이 반복된다면 검색 노출에 불리하게 작용할 수 있으므로 업체의 브랜드나 서비스 정보를 잘 설명할 수 있는 내용으로 간결하게 작성하는 것이 좋습니다.
자세한 내용은 웹 표준 HTML 마크업 가이드의 콘텐츠 항목을 참고하세요.
-
웹 페이지의 제목은 검색결과의 첫번째 행에 나오는 중요한 정보입니다. 만약 사이트의 제목이 비워져 있거나 품질에 문제가 있다면 검색엔진은 페이지 내의 정보중 가장 적절한 것을 자동 추출하거나 해당 페이지를 링크한 앵커 텍스트를 활용하여 가장 적합한 내용을 판단하여 검색결과에 노출합니다. 검색 사용자가 여러분의 콘텐츠를 잘 찾을 수 있도록 명확하고 고유한 제목을 기입해주세요.
자세한 내용은 웹 표준 HTML 마크업 가이드의 콘텐츠 항목을 참고하세요.
-
웹 페이지의 제목은 고유해야 합니다. 페이지 콘텐츠에 맞는 고유한 제목을 기입해야 검색 사용자가 여러분의 콘텐츠를 찾을 가능성이 높아집니다. 검색 사용자가 정보 탐색을 위하여 검색어를 입력시 여러분 사이트의 콘텐츠가 동일한 제목으로 나열된다면 사용자의 선호도 측면에서 불리할 수 있습니다. 콘텐츠의 주제에 맞는 고유한 제목을 기입하는 것은 사이트 품질 향상을 위한 가장 중요한 작업입니다.
네이버의 웹문서 검색 탭에서 site: 질의를 활용하여 내 사이트의 주소를 넣어보세요. 검색 결과에 노출되는 문서가 동일한 제목으로 나온다면 웹 페이지의 title 태그가 비워져 있거나 동일한 내용으로 채워져 있는지 확인해 볼 필요가 있습니다.
- (예) 네이버 도메인의 site: 질의 검색 결과
site:naver.com
- (예) 네이버 도메인의 site: 질의 검색 결과
4. 사이트 구조
-
사이트 구조와 관련된 대표 품질 항목은 웹 페이지의 HTML이 검색엔진이 이해할 수 있는 구조로 작성되어 있는지 여부입니다. 웹 페이지가 훌륭한 콘텐츠로 채워져 있더라도 검색엔진이 이해할 수 없는 구조로 표현되어 있다면 품질평가에 불리하게 작용 될 수 있습니다. 사이트 개발 담당자와 같은 전문가의 도움을 받아서 콘텐츠의 구조에 적합한 HTML을 작성해 주세요.
-
네이버 검색엔진은 수집된 웹 페이지의 구조를 평가하는 단계에서 콘텐츠를 표현하는 HTML 태그를 항목별 분리하여 해석합니다. 사람이 보는 웹 브라우저 상에서는 문제가 없지만 기계인 검색로봇이 해석하기 어려운 대표적인 예를 살펴보면 다음과 같습니다.
HTML <head> 태그 정보 중 잘못 사용된 예
- 문서의 제목,설명 태그와 같이 웹 문서의 콘텐츠를 요약할 수 있는 정보가 없는 경우
<title></title>
<meta name="description" content="">
- 웹 서버가 제공하는 문자열 인코딩 방식과 다르게 meta 태그의 charset 속성을 지정한 경우
<-- 웹서버는 utf-8 방식의 인코딩을 사용하지만 meta 태그의 charset 값은 euc-kr 인코딩 방식으로 지정-->
<meta charset="euc-kr">HTML <body> 태그 정보 중 잘못 사용된 예
- 콘텐츠의 내용이 <frame> 태그로 지정되어 있는 경우
<frame src="https://webmastertool.naver.com">
- <head> 태그내에 존재해야 하는 정보가 <body> 태그내에 있는 경우
<body>
<title> 제목은 head 태그 내부에 존재해야 합니다.</title>
</body>
- 링크 표현시 javascript를 사용하여 해석을 어렵게 만든 경우
<a href="#" onclick="javascript:goto(A)">웹마스터도구</a> -
사이트의 링크 관리는 사이트의 방문자 뿐만이 아니라 검색엔진의 입장에서도 매우 중요합니다. 링크에 사용된 앵커 텍스트를 통하여 사용자는 사이트내의 원하는 콘텐츠를 탐색하는데 도움을 받을 수 있으며, 검색엔진은 앵커 텍스트를 통해서 링크된 문서의 함축적인 내용을 이해하고 링크를 직접 방문하여 수집에 활용합니다.
앵커 텍스트란?
- 웹 문서에서 다른 웹문서나 사이트를 소개하는 링크에 사용되는 텍스트 또는 키워드
<a href="https://webmastertool.naver.com/">웹마스터도구</a>앵커 텍스트는 링크된 문서를 가장 잘 표현할 수 있는 간결한 텍스트를 사용하는 것을 권장합니다. 문서와 연관된 앵커 텍스트의 적절한 사용은 사용자의 이탈율을 줄이고 문서 만족도를 높히는 효과가 있습니다. 하지만 검색 상위 노출을 목적으로 동일한 키워드를 앵커 텍스트로 사용하는 경우 검색 노출에 불이익을 받을 수 있으니 주의해야 합니다.
이미지 alt 속성이란?
- 이미지가 브라우저에서 표시할 수 없는 환경에서 이미지를 대체할 수 있는 텍스트
<img src="images/webmaster-main.jpg" alt="웹마스터도구 메인 이미지">문서내 이미지의 경우도 alt 속성을 활용하여 이미지를 대체할 수 있는 텍스트로 표현할 수 있습니다. 이 정보는 검색엔진이 해당 이미지를 이해하는데 도움울 줄 수 있으며 이미지 검색결과에 활용할 수 있는 매우 중요한 정보로 간주합니다. 앵커 텍스트와 마찬가지로 이미지 alt 속성도 검색 상위 노출을 목적으로 동일한 텍스트를 사용한다면 불이익을 받을 수 있으니 이미지를 표현할 수 있는 명확한 텍스트를 지정해 주세요.
5. 사이트 활성화
-
사이트 활성화와 관련된 대표 품질 항목은 검색에 반영되는 콘텐츠의 양과 사이트에 대한 외부 평판으로 나눌 수 있습니다. 활성화 지표를 높이기 위해서는 사이트의 목적에 맞는 콘텐츠의 지속적으로 발행하여 방문자의 유입을 증가시켜야 하며, 권위 있는 웹 페이지에 여러분의 사이트가 자연스럽게 인용될 수 있도록 홍보하는 노력을 기울어야 합니다.
-
사이트의 콘텐츠가 많더라도 검색로봇이 수집을 못하여 색인이 안되는 경우 검색 노출이 불가능합니다. 검색 로봇이 수집을 잘 할 수 있도록 XML 사이트맵을 제출하는 것부터 시작하여 문서내의 링크를 검색엔진이 잘 해석할 수 있도록 구성하는 것이 중요합니다.
-

사이트의 내부 링크 구성도 중요하지만 신뢰할 수 있는 외부 사이트에서 여러분의 콘텐츠가 링크로 언급되는 것이 가장 중요합니다. 예를들어, 특정 문서가 동일 사이트내의 다른 웹 페이지에서 10개의 링크로 언급 되는 것보단 10개의 다른 사이트에서 언급되는 것이 신뢰도 측면에서 유리하다고 판단할 수 있습니다. 다만, 외부링크의 언급 빈도를 높히기 위하여 의도적으로 만들어진 사이트에서 여러분의 사이트가 언급이 된다면 검색 노출시 불이익을 받을 수 있으니 주의 해야 합니다.
네이버 내의 다양한 서비스에서 여러분의 사이트를 언급할 수 있는 다양한 방법이 존재합니다. 네이버는 비즈니스 목적으로 활용할 수 있는 다양한 무료 도구와 블로그, 카페 등의 커뮤니티 공간을 무료로 제공하고 있습니다. 이러한 서비스를 활용하여 여러분의 사이트가 보다 많은 사용자에게 확산될 수 있도록 노력해 주세요.
사이트 평판 향상의 전제조건은 사이트의 목적에 맞는 양질의 콘텐츠를 지속적으로 관리하는 것입니다. 사이트 방문자를 통해서 양질의 콘텐츠가 자연스럽게 외부 웹 페이지에 인용된다면 여러분의 사이트 평판도 자연스럽게 향상될 수 있습니다.
파일명 :naver_shop.php
================================================
<link rel="stylesheet" href="https://maxcdn.bootstrapcdn.com/bootstrap/3.3.2/css/bootstrap.min.css" rel="nofollow" target="_blank">
파일명 : naver_shop_data.php
================================================

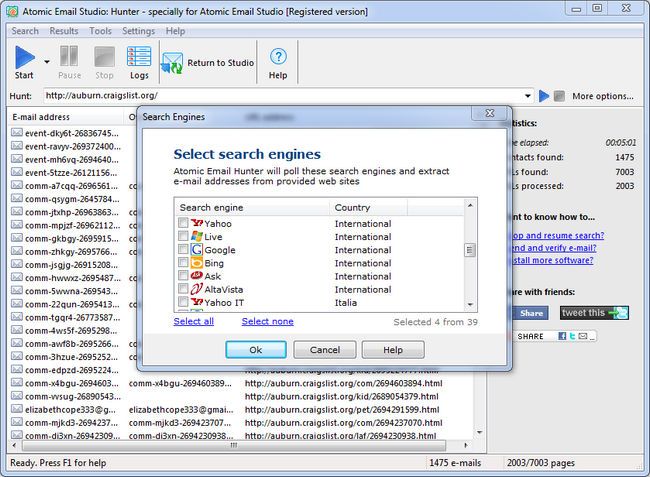
Features of Atomic Email Hunter
결과
Array ( [0] => AAA [1] => BBB [2] => DDD [3] => EEE )
https://youngsam.net/BrowserAgentInfo.php
아래는 귀농넷 회원 분께서 올리신 귀농지 임야 입니다. 함께 올려요 ^^


Hello

For the earliest villages, the rural land of the farmhouses would be essential.

Real estate bubbles are heavy and hard to find here and there. So today I am going to introduce the real estate information site in the countryside directly.


It is possible to deal with the farmland housing transaction information of the farm house in the farm net directly

I built a homepage.


Rural land information of farmhouses


It is good to check the land information of Oji Land for camping site sometimes.

If you do not have any information about the country you are looking for

If you leave a comment, you can contact me quickly.


I will post on homepage and Naverband address


Homepage http://www.gwinong.net


   (Cement packing is also available.) In addition, we are in the process of further development of the farm information, the farm community, and the job search. Membership is also increasing. ^^


The following is the re-registration site uploaded by the member of the net. I'm with you ^^
સ્વાગત

Arguenon gwichon વાડીમાં મકાનોની આસપાસનો ભૂમિભાગ ગ્રામીણ આવાસન જમીન અનિવાર્યપણે haltendeyo કરવા માટે જરૂરી છે

ગંભીર અને તે પણ રિયલ એસ્ટેટ બબલ himdeuljyo પણ અહીં અને ત્યાં જાણી શકો છો. તેથી આજે એક સીધા વ્યવહારો ગ્રામીણ એસ્ટેટ માહિતી સાઇટ રજૂ કરશે.


ચાર Arguenon સીધી વહેવાર કરે છે ગ્રામીણ હોમસ્ટેડ નિવાસી જમીન વ્યવહાર માહિતી સાથે વ્યવહાર કરી શકો છો કે

અમે એક વેબસાઇટ બનાવી છે.


હવે વાસ્તવિક સમય ખેડૂતો ગ્રામીણ આવાસન જમીન માહિતી મેળવો


ફોરેસ્ટ્રી માર્કેટિંગ માહિતી ક્યારેક છાવણી ખાતરી કરો up'm વેઠવો તમે જુઓ કે કાદવ માટે સારી પણ હોઈ

તમે માહિતી તમે ગ્રામીણ જમીન માટે જોઈ રહ્યા હોય ન હોય તો

તમે ડાબી જુઓ જો હું ટૂંક સમયમાં ફરીથી સંપર્ક galdeut લખવાનું છું


અમે લેખની હેઠળ હોમપેજ અને નાવર સરનામું બેન્ડઝ પર રહેશે


મુખ્ય http://www.gwinong.net


   વધુ માટે Arguenon માહિતી Arguenon સમુદાય જોબ ઉમેરવા વિકસાવવામાં આવી છે (તે પેકેજિંગ સિમેન્ટ છે). સભ્યો પણ વધી રહી છે. ^^


નીચે જંગલ gwinongji ચાર સભ્યો મિનિટ તમે પોસ્ટ Arguenon છે. એકસાથે મૂકો ^^
Svāgata

Arguenon gwichon vāḍīmāṁ makānōnī āsapāsanō bhūmibhāga grāmīṇa āvāsana jamīna anivāryapaṇē haltendeyo karavā māṭē jarūrī chē

gambhīra anē tē paṇa riyala ēsṭēṭa babala himdeuljyo paṇa ahīṁ anē tyāṁ jāṇī śakō chō. Tēthī ājē ēka sīdhā vyavahārō grāmīṇa ēsṭēṭa māhitī sā'iṭa rajū karaśē.


Cāra Arguenon sīdhī vahēvāra karē chē grāmīṇa hōmasṭēḍa nivāsī jamīna vyavahāra māhitī sāthē vyavahāra karī śakō chō kē

amē ēka vēbasā'iṭa banāvī chē.


Havē vāstavika samaya khēḍūtō grāmīṇa āvāsana jamīna māhitī mēḷavō


phōrēsṭrī mārkēṭiṅga māhitī kyārēka chāvaṇī khātarī karō up'm vēṭhavō tamē ju'ō kē kādava māṭē sārī paṇa hō'ī

tamē māhitī tamē grāmīṇa jamīna māṭē jō'ī rahyā hōya na hōya tō

tamē ḍābī ju'ō jō huṁ ṭūṅka samayamāṁ pharīthī samparka galdeut lakhavānuṁ chuṁ


amē lēkhanī hēṭhaḷa hōmapēja anē nāvara saranāmuṁ bēnḍajha para rahēśē


mukhya http://Www.Gwinong.Net


   vadhu māṭē Arguenon māhitī Arguenon samudāya jōba umēravā vikasāvavāmāṁ āvī chē (tē pēkējiṅga simēnṭa chē). Sabhyō paṇa vadhī rahī chē. ^^


Nīcē jaṅgala gwinongji cāra sabhyō miniṭa tamē pōsṭa Arguenon chē. Ēkasāthē mūkō ^^
|
Type |
상태 |
데이터 타입 |
컨트롤 타입 |
|
hidden |
숨김 |
임의의 문자열 |
n/a |
|
text |
텍스트 |
줄바꿈 없는 텍스트 |
텍스트 필드 |
|
search |
검색 |
줄바꿈 없는 텍스트 |
검색 필드 |
|
tel |
전화번호 |
줄바꿈 없는 텍스트 |
텍스트 필드 |
|
url |
URL |
절대 IRI |
텍스트 필드 |
|
|
이메일 |
이메일 주소 or 이메일 주소 리스트 |
텍스트 필드 |
|
password |
비밀번호 |
줄바꿈 없는 텍스트 |
데이터 입력이 나타나지 않는 텍스트 필드 |
|
datetime |
날짜와 시각 |
UTC 날짜와 시각 |
날짜와 시각 컨트롤 |
|
date |
날짜 |
시간대 없는 날짜 |
날짜 컨트롤 |
|
month |
달 |
시간대 없는 년과 달 |
달 컨트롤 |
|
week |
주 |
시간대 없는 주 번호 |
주 컨트롤 |
|
time |
시각 |
시간대 없는 시각 |
시각 컨트롤 |
|
datetimelocal |
로컬 날짜와 시각 |
시간대 없는 날짜와 시각 |
날짜와 시각 컨트롤 |
|
number |
숫자 |
숫자 값 |
텍스트 or 스피너 컨트롤 |
|
range |
범위 |
숫자 값 or 정확한 숫자가 필요없는 의미상의 값 |
슬라이더 컨트롤 |
|
color |
색 |
8-bit 적녹형 sRGB컬러 |
컬러 웰 |
|
checkbox |
체크박스 |
이미 설정된 리스트 값의 0 or 다른 값 |
체크박스 |
|
radio |
라디오 버튼 |
지정된 값 |
라디오 버튼 |
|
file |
파일 입력창 |
MIME type과 파일명이 있는 파일 목록 |
레이블과 버튼 |
|
submit |
전송 버튼 |
폼 서식을 전송하는 지정된 값 |
버튼 |
|
image |
이미지 버튼 |
폼 서식을 전송하는 이미지 좌표 값 |
클릭 가능한 이미지 or 버튼 |
|
reset |
리셋 버튼 |
- |
버튼 |
|
button |
버튼 |
- |
버튼 |
출처: http://slreference.tistory.com/7 [reference]
Piwik(Open source web analytics) 구글 Google Analytics와 유사합니다. 독립적으로 설치해서
여러 도메인 통계 정보 등을 파악 할수 있습니다. 설치 방법도 간단합니다.
사용하다
다른 검색 엔진은 이상이 없으나 네이버 naver 는 유니코드 문제로 한글 키워드가 제대로 안나오는 문제가 생겨
소스를 보게 되었습니다.
piwik\core\DataFiles\SearchEngines.php 파일을 열어 보시면 .
650 라인에
// Naver
'search.naver.com' => array('Naver', 'query', 'search.naver?query={k}', 'EUC-KR'),
이런 소스가 보입니다. 위 라인을
'search.naver.com'=> array('Naver', 'query', 'search.naver?query={k}'),
으로 변경하면 정상적으로 한글이 잘 보입니다.
Everything search engine
파일과 폴더 이름으로 위치를 빠르게 찾아줍니다
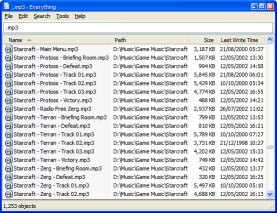
- 깨끗하고 간결한 사용자 환경
- 빠른 인덱싱
- 빠른 검색
- 최소한의 시스템 자원 사용
- 다른 사람과 파일을 쉽게 공유
- 실시간 업데이트
컴퓨터 안에 있는 모든 파일을 0.1초 이내에 검색할 수 있다면 믿을 수 있나요? 하드디스크 내의 모든 파일을 DB화해서 검색하는 프로그램을 소개합니다. 첨부한 영상은 절대 빨리감기를 한 것이 아니라 원래 이 프로그램의 속도 입니다.
str = "search list"
chk = Instr(str,"list")
Response.Write chk
%>
대상 문자열에서 지정한 문자열이 있으면 몇번째에 있는지 숫자를 반환하고, 없으면 0 을 반환한다.
PHP 의 substr 과 같은 역할을 하는 함수.
주의할점은, 대소문자를 구별하므로, 대소문자가 틀릴경우 0 을 반환하며,
대소문자 구별없이 찾으려면 먼저 UCase 또는 LCase 로 변환한후 비교하여야 한다.
네이버나 다음 메일에서 다른 컨텐츠 다 빼버리고 리스트만 골라서 로그인 없이 바로 내 웹페이지에서 볼 수 있는 것.
일반 링크가 아닌 자바스크립트 클릭만으로 나오는 DOM 부분의 원하는 내용을 긁어 와서 붙여넣는 것.
내 웹페이지에서 쓴 글을 네이버 카페, 다음 블로그 등에 동시에 올릴 수 있는 것.
위 항목은 현재 HTML5도 마찬가지로 일반적인 웹의 환경(ActiveX 제외)에서는 불가능합니다.
node.js 가 나오고 전세계의 개발자들이 그 기반하에 여러가지 오픈 모듈(npm)을 만들었는데 그 중에서
요즘 제 뒷통수를 강하게 때린 webdriverJS 모듈을 소개합니다.
사전 지식은 리눅스, 유닉스 기반하에 node.js를 어느정도 컨트롤 할 줄 알고 npm이 뭔지 알 정도면 됩니다.
Camilo Tapia란 외쿡 개발자가 만든 npm 모듈로서 기반은 node.js + Java Selenium + 자바스크립트
로 구성되어 있습니다.
브라우저 테스팅 툴인 Java Selenium이 설치가 되어 있어야 하며 리눅스나 유닉스에서는 standalone 버젼이
있으므로 걍 jar 파일만 실행 하면 됩니다. (자세한 사용법은 하단 URL 참고 )
작동 원리는 Java Selenium 서버에 node.js가 통신을 해서 Java Selenium과 연동을 통해 브라우저를 띄우고
wire protocol bindings으로 클릭, 캡쳐, submit 등등 브라우저 자체를 컨트롤 할 수 있습니다.
예를 들어 클라이언트 웹브라우저에서 자체 홈페이지에 들어오면 로딩하는 동시에 socket.io를 이용해서
클라이언트 pc의 URL을 node.js 서버로 전송하고 node.js에서는 Selenium 통해 브라우저를 실행시키고
Selenium 캡쳐 기능을 실행하면 서버에 이미지가 저장됩니다.
이 외에도 로그인 전용 페이지의 특정 영역을 가져와서 클라이언트에 보여주고 등등
webdriverJS GIT 홈페이지에 들어가셔서 지원하는 기능을 확인하시면 정말 활용할 수 있는 방법이 무궁 무진합니다.
해당 서버 소스는 네이버 자동 띄어쓰기 기능 자체를 서버로 해서 사용자 pc에서 입력한 한글을 webdriverJS 서버
에서 자동으로 브라우저가 실행되어 띄어쓰기된 결과값을 클라이언트에 리턴해주는 소스입니다.
-------------------------------------------------------------------------------------------------------
var client = require("webdriverjs").remote({desiredCapabilities:{browserName:"chrome",handlesAlerts:true}});
var now = require("now");
var express = require('express');
var app = express.createServer();
app.listen(7878);
var everyone = now.initialize(app);
client.init() ;
client.url("http://s.lab.naver.com/autospacing/");
var prContent = "";
everyone.now.callList = function(reqTxt){
client.url("http://s.lab.naver.com/autospacing/?query="+reqTxt);
client.submitForm("#search_form");
client.execute("return document.getElementsByClassName('wrap_spacing2')[0].innerHTML",function(result){everyone.now.returnPostHTML(result.value);
});
}
-------------------------------------------------------------------------------------------------------
서버상에서 브라우저를 맘대로 컨트롤 하고 그 결과값이나 동작 입맛에 맛게 가져오는 것.. 엄청난 강점일 거 같습니다.
node.js 자체도 나름 강력한 부분이 있지만 더 큰 강점은 npm에 있나봅니다. 집단 지성의 강점
한 번 활용해 보시면 재밌습니다.
참고 URL은 https://github.com/Camme/webdriverjs 입니다.
<script>
function SearchCheckForm(f){
if( f.keyword.value ==
""){
alert("검색창에 아티스트나 곡명을 입력해주세요.");
f.keyword.focus();
return
false;
}
}
</script>
<form action="/ezmart.php"
name="SearchCheck" method = "get" onsubmit='return SearchCheckForm(this);'
>
<input type = "hidden" name="tquery"
value="martmain">
<table width="540" border="0" cellspacing="0"
cellpadding="0">
<tr>
<td width="228"><img
src="/01_img/main/search.gif" width="228" height="34" /></td>
<td background="/01_img/main/search-02.gif" width="261" height="34"
class="txtLeft"><input name="keyword" type="text" style="margin:5px 8px
5px 8px; padding:1px; border:none; height:16px; width:238px;"
value="<?=urldecode(stripslashes($keyword))?>" /></td>
<td align="right" valign="middle"><input type = "image"
src="/01_img/main/search-03.gif" width="51" height="34" /></td>
</tr>
</table>
</form>
<?
/*
DB에서의 저장은
1) '
2) '
2가지로 되어 있는 싱태 이다
ex)
Don\'t Cry (원음 MR)
Don\'t Say Goodbye (MR)
Don\'t Cry
(로열패밀리 OST)
*/
// 홑따움표를 변환 시킨다.
if($keyword){
$tkeyword =
strip_tags(trim(urldecode(stripslashes($keyword))));
$tkeyword =
str_replace(' ' , '' , $tkeyword);
$tkeyword = preg_replace("/\'/", "",
$tkeyword);
$tkeyword = preg_replace("/\'/", "",
$tkeyword);
$where .= " and ( " ;
$where .= " (
REPLACE(Name,' ','') LIKE '%$tkeyword%' OR REPLACE(Model,' ','') LIKE
'%$tkeyword%' ) ";
$where .= " or ( REPLACE( Name, '\\\\'', ''
) LIKE '%$tkeyword%' OR REPLACE( Model, '\\\\'', '' ) LIKE
'%$tkeyword%' ) ";
$where .= " or ( REPLACE( Name, '\\\\\\'', '' )
LIKE '%$tkeyword%' OR REPLACE( Model, '\\\\\\'', '' ) LIKE '%$tkeyword%' )
";
$where .= " ) ";
}
?>
<?
$TransData = "tquery=$tquery&code=$code&keyword=" .
urlencode(stripslashes($keyword));
include
"${SKIN_FOLDER_NAME}/page/${PageSkin}/index.php" ;
?>
'////////////////////////////////////////////////////////////////////
'//가. 명령어 삽입(Command Injection) 가능성
'////////////////////////////////////////////////////////////////////
Dim title, str
title = "What's Up!!! <what happen> Oh my god!!!! & goodness"
str = ""
//변환을 수행할 함수
Sub ReplaceStr(content, byref str)
content = replace(content, "'", """)
content = replace(content, "&", "&")
content = replace(content, "<", "<")
content = replace(content, ">", ">")
str = content
End Sub
ReplaceStr title, str
response.write str
%>
'////////////////////////////////////////////////////////////////////
'//나. 크로스 사이트 스크립팅 (XSS) 가능성
'////////////////////////////////////////////////////////////////////
/include/config.inc.asp
<%
atag = "p,br" 'XSS 허용할 태그 리스트
UploadedPath = "/Uploaded_Files/" '업로드 기본 경로
fileext = "jpg,gif,png,pcx" '허용할 확장자 리스트
%>
/include/secure.inc.asp
<%
'공격 위험성이 존재하는 문자들을 필터링
'문자열 입력값을 검증
'숫자형은 데이터 타입을 별도로 체크하도록 한다.
Function sqlFilter(search)
Dim strSearch(5), strReplace(5), cnt, data
'SQL Injection 특수문자 필터링
'필수 필터링 문자 리스트
strSearch(0)="'"
strSearch(1)=""""
strSearch(2)="\"
strSearch(3)=null
strSearch(4)="#"
strSearch(5)="--"
strSearch(6)=";"
'변환될 필터 문자
strReplace(0)="''"
strReplace(1)=""""""
strReplace(2)="\\"
strReplace(3)="\"&null
strReplace(4)="\#"
strReplace(5)="\--"
strReplace(6)="\;"
data = search
For cnt = 0 to 6 '필터링 인덱스를 배열 크기와 맞춰준다.
data = replace(data, LCASE(strSearch(cnt)), strReplace(cnt))
Next
sqlFilter = data
End Function
'XSS 출력 필터 함수
'XSS 필터 함수
'$str - 필터링할 출력값
'$avatag - 허용할 태그 리스트 예) $avatag = "p,br"
Function clearXSS(strString, avatag)
'XSS 필터링
strString = replace(strString, "<", "<")
strString = replace(strString, "\0", "")
'허용할 태그 변환
avatag = replace(avatag, " ", "") '공백 제거
If (avatag <> "") Then
taglist = split(avatag, ",")
for each p in taglist
strString = replace(strString, "<"&p&" ", "<"&p&" ", 1, -1, 1)
strString = replace(strString, "<"&p&">", "<"&p&">", 1, -1, 1)
strString = replace(strString, "</"&p&" ", "</"&p&" ", 1, -1, 1)
next
End If
clearXSS = strString
End Function
'확장자 검사
'$filename: 파일명
'$avaext: 허용할 확장자 예) $avaext = "jpg,gif,pdf"
'리턴값: true-"ok", false-"error"
Function Check_Ext(filename,avaext)
Dim bad_file, FileStartName, FileEndName
If instr(filename, "\0") Then
Response.Write "허용하지 않는 입력값"
Response.End
End If
'업로드 금지 확장자 체크
bad_file = "asp,html,htm,asa,hta"
filename = Replace(filename, " ", "")
filename = Replace(filename, "%", "")
FileStartName = Left(filename,InstrRev(filename,".")-1)
FileEndName = Mid(filename, InstrRev(filename, ".")+1)
bad_file = split(bad_file, ",")
for each p in bad_file
if instr(FileEndName, p)>0 then
Check_Ext = "error"
Exit Function
end if
next
'허용할 확장자 체크
if avaext <> "" Then
ok_file = split(avaext, ",")
for each p in ok_file
if instr(FileEndName, p)>0 then
Check_Ext = "ok"
Exit Function
End If
next
End If
Check_Ext = "error"
End Function
'다운로드 경로 체크 함수
'$dn_dir - 다운로드 디렉토리 경로(path)
'$fname - 다운로드 파일명
'리턴 - true:파운로드 파일 경로, false: "error"
Function Check_Path(dn_dir, fname)
'디렉토리 구분자를 하나로 통일
dn_dir = Replace(dn_dir, "/", "\")
fname = Replace(fname, "/", "\")
strFile = Server.MapPath(dn_dir) & "\" & fname '서버 절대경로
strFname = Mid(fname,InstrRev(fname,"\")+1) '파일 이름 추출, ..\ 등의 하위 경로 탐색은 제거 됨
Response.Write strFname
strFPath = Server.MapPath(dn_dir) & "\" & strFname '웹서버의 파일 다운로드 절대 경로
If strFPath = strFile Then
Check_Path = strFile '정상일 경우 파일 경로 리턴
Else
Check_Path = "error"
End If
End Function
'IP 체크 함수
Function Check_IP(IP_Addr)
If Request.Servervariables("REMOTE_ADDR") = IP_Addr Then
Check_IP = "TRUE"
Else
Check_IP = "FALSE"
End If
End Function
%>
/head.asp
<%
'페이지에서 에러가 발생하여도 페이지 오류를 외부로 출력하지 않기위해 사용
On Error Resume Next
'On Error GoTo 0도 가능하나 2003에서는 실행되지 않음
if err.number <> 0 then
'Response.Write err.description & "<BR>" & err.source & "<BR>"
err.clear
End if
%>
/content.asp
<!--#include virtual="/include/connection.inc.asp"--> <% 'DB연결 헤더 %>
<!--#include virtual="/include/secure.inc.asp"--> <% '보안관련라이브러리 %>
<!--#include virtual="/include/config.inc.asp"--> <% '전역변수리스트 %>
<!--#include virtual="/head.asp"--> <% '초기 설정 페이지(에러 메세지 미출력) %>
<%
Dim strSQL
Dim intSeq, strName, strEmail, strSubject, strContent, intCount, dtmReg_Date, intExist
Dim blnTag, strUserIP
Dim atag
'입력값이 숫자형인 경우 IsNumeric 함수를 사용한다.
If IsNumeric(seq) Then
intSeq = Request.QueryString("seq")
Else
Response.Write "허용하지 않는 입력값입니다."
Reponse.End
End If
'문자(열)인 경우 sqlfilter 사용
'intSeq = sqlFilter(Request.QueryString("seq")) 'SQL Injection 필터링
'읽은 횟수 검색
strSQL = "SELECT count(*) FROM board WHERE intSeq='" & intSeq & "'"
objRs.Open strSQL, objDBConn
intExist = objRs(0)
objRs.Close
If intExist <> 1 Then
Response.Write "해당글이 없습니다."
Else
'읽은 횟수 증가
strSQL = "UPDATE board SET intCount=intCount+1 WHERE intSeq='" & intSeq & "'"
objRs.Open strSQL, objDBConn
'게시물 SELECTZ
strSQL = "SELECT strName,strEmail,strSubject,strContent,intCount,strUserIP,blnTag,dtmReg_Date FROM board WHERE intSeq='" & intSeq & "'"
objRs.Open strSQL, objDBConn
strName = objRs(0)
strEmail = objRs(1)
strSubject = objRs(2)
strContent = objRs(3)
intCount = objRs(4)
strUserIP = objRs(5)
blnTag = objRs(6)
dtmReg_Date = objRs(7)
objRs.Close
Set objRs = Nothing
objDBConn.Close
Set objDBConn = Nothing
'게시물 출력값에 XSS 필터링
'사용자가 입력하는 출력되는 값은 strName, strEmail, strSubject, strContent으로 이 부분은 XSS 공격이 가능한 부분들이다.
'일반적으로 본문만 선택적으로 HTML 태그 사용을 허용하며 나머지 부분들은 사용할 수 없도록 하는것이 바람직하다.
strName = clearXSS(strName, atag)
strEmail = clearXSS(strEmail, atag)
strSubject = clearXSS(strSubject, atag)
strContent = clearXSS(strContent, atag)
'줄넘김 처리
strContent = replace(strContent, vbLf, vbLf & "<br>")
%>
<html>
<head>
<meta http-equiv="Content-Type" content="text/html; charset=ks_c_5601-1987">
<title>내용보기</title>
</head>
<body>
<div align=center>
<table border=1>
<tr>
<td>이름</td>
<td><%=strName%></td>
<td>등록일</td>
<td><%=dtmReg_Date%></td>
</tr>
<tr>
<td>이메일</td>
<td><%=strEmail%></td>
<td>조회</td>
<td><%=intCount%></td>
</tr>
<tr>
<td>제목</td>
<td colspan=3><%=strSubject%></td>
</tr>
<tr>
<td>내용</td>
<td colspan=3><%=strContent%></td>
</tr>
<tr>
<td colspan=4>
<a href="list.asp">목록으로</a> <a href="edit.asp?seq=<%=intSeq%>">수정하기</a> <a href="delete.asp?seq=<%=intSeq%>">삭제하기</a>
</td>
</tr>
</table>
</div>
</body>
</html>
<%
End If
%>
'////////////////////////////////////////////////////////////////////
'//다. SQL 구문 삽입 가능성
'////////////////////////////////////////////////////////////////////
SQL Injection은 쿼리문의 잘못 해석함에서 발생하는 문제이다. 이를 해결하기 위해서는 쿼리문을 생성시에 입력된 값에 대한 유효성 검사를 수행하면 된다. ‘, “ 문자를 \’, \”로 변경해 주거나 아예 공백으로 처리하는 방법이다.
삭제해야 할 프로시저
xp_cmdshell
xp_stratmail
xp_sendmail
xp_grantlogin
xp_makewebtask
'////////////////////////////////////////////////////////////////////
'//사. 다운로드 취약성
'////////////////////////////////////////////////////////////////////
<!--#include virtual="/include/connection.inc.asp"--> <% 'DB연결 헤더 %>
<!--#include virtual="/include/secure.inc.asp"--> <% '보안관련라이브러리 %>
<!--#include virtual="/include/config.inc.asp"--> <% '전역변수리스트 %>
<!--#include virtual="/head.asp"--> <% '초기 설정 페이지(에러 메세지 미출력) %>
<%
Dim dn_dir, fname, val_ok
Dim UploadedPath
dn_dir = Request("dir")
fname = Request("fname") '파일 이름
' IE 5.01에서는 이 방식을 사용할때 메모리 관련 문제가 발생할 수 있다.
strUA = Request.ServerVariables("HTTP_USER_AGENT")
If Instr(strUA, "MSIE") Then
intVersion = CDbl(mid(strUA, Instr(strUA, "MSIE")+5, 3))
If intVersion < 5.01 Then
Response.Write "error"
End If
End If
if fname = "" Then
Response.Write "<script language=javascript>"
Response.Write "alert(""파일명을 입력해 주세요"");"
Response.Write "history.back();"
Response.Write "</script>"
End If
dn_dir = UploadedPath & dn_dir
val_ok = Check_Path(dn_dir, fname)
If val_ok <> "error" Then '사용자가 다운 받는 파일과 웹서버의 파일 다운로드 경로가 맞는지 비교
Set objStream = Server.CreateObject("ADODB.Stream") 'Stream 이용
Response.ContentType = "application/unknown" 'ContentType 선언
Response.AddHeader "Content-Disposition","attachment; filename=" & fname
objStream.Open
objStream.Type = 1
objStream.LoadFromFile val_ok
download = objStream.Read
Response.BinaryWrite download
End If
Set objstream = nothing '객체 초기화
%>
var banner_count = 1;
var cur_banner = 1;
var timeout_id;
function all_banner_clear() {
var banner_id = "";
for( var i=1; i<= banner_count; i++) {
banner_id = 'all_banner_'+ i;
document.all[banner_id].style.visibility='hidden';
}
clearTimeout(timeout_id);
}
function all_banner_change() {
var next_banner = cur_banner+1;
var banner_id = "";
if( next_banner > banner_count ) {
next_banner = 1;
}
banner_id = 'all_banner_'+ cur_banner;
document.all[banner_id].style.visibility='hidden';
banner_id = 'all_banner_'+ next_banner;
document.all[banner_id].style.visibility='visible';
cur_banner = next_banner;
timeout_id = window.setTimeout("all_banner_change()",4000);
}
function all_banner_open() {
if (screen.width==800) {
var w_left = 0;
} else {
var w_left = (screen.width)?(screen.width-600)/2:100;
}
var banner_id = "";
for(var i = 1; i<= banner_count; i++ ) {
banner_id = 'all_banner_' + i;
document.all[banner_id].style.left=w_left;
}
if (getCookie("all_banner_img") == null) {
document.all['all_banner_1'].style.visibility='visible';
selectbox_hidden(all_banner_1);
//timeout_id = window.setTimeout("all_banner_change()",4000);
} else {
document.all['all_banner_1'].style.visibility='hidden';
selectbox_visible();
}
}
function all_banner_cookie() {
if (document.all.cookie_check.checked == true) {
setCookie("all_banner_img", "true", 1);
}
document.all['all_banner_1'].style.visibility = "hidden";
clearTimeout(timeout_id);
}
function getCookie(Name) {
var search = Name + "="
if (document.cookie.length > 0) {
offset = document.cookie.indexOf(search)
if (offset != -1) {
offset += search.length
End = document.cookie.indexOf(";", offset)
if (End == -1)
End = document.cookie.length
return unescape(document.cookie.substring(offset, End))
}
}
}
function setCookie(name, value, expiredays) {
var todayDate = new Date();
todayDate.setDate( todayDate.getDate() + expiredays );
document.cookie = name + "=" + escape( value ) + "; path=/; expires=" + todayDate.toGMTString() + ";"
}
function selectbox_hidden(layer_id) {
var ly = eval(layer_id);
// 레이어 좌표
var ly_left = ly.offsetLeft;
var ly_top = ly.offsetTop;
var ly_right = ly.offsetLeft + ly.offsetWidth;
var ly_bottom = ly.offsetTop + ly.offsetHeight;
// 셀렉트박스의 좌표
var el;
for (i=0; i<document.forms.length; i++) {
for (k=0; k<document.forms[i].length; k++) {
el = document.forms[i].elements[k];
if (el.type == "select-one") {
var el_left = el_top = 0;
var obj = el;
if (obj.offsetParent) {
while (obj.offsetParent) {
el_left += obj.offsetLeft;
el_top += obj.offsetTop;
obj = obj.offsetParent;
}
}
el_left += el.clientLeft;
el_top += el.clientTop;
el_right = el_left + el.clientWidth;
el_bottom = el_top + el.clientHeight;
// 좌표를 따져 레이어가 셀렉트 박스를 침범했으면 셀렉트 박스를 hidden 시킴
if ((ly_right >= el_left && ly_left <= el_right) && (ly_bottom >= el_top && ly_top <= el_bottom))
el.style.visibility = 'hidden';
}
}
}
}
// 감추어진 셀렉트 박스를 모두 보이게 함
function selectbox_visible() {
for (i=0; i<document.forms.length; i++) {
for (k=0; k<document.forms[i].length; k++) {
el = document.forms[i].elements[k];
if (el.type == "select-one" && el.style.visibility == 'hidden')
el.style.visibility = 'visible';
}
}
}
</SCRIPT>
<DIV id=all_banner_1 style="Z-INDEX: 8; LEFT: 400px; VISIBILITY: hidden; POSITION:
<IFRAME style="Z-INDEX: -1; ; LEFT: expression
WIDTH: expression
TOP: expression
src="about:blank" frameBorder=0></IFRAME>
<TABLE cellSpacing=0 cellPadding=0 width=400 bgColor=#ffffff border=0>
<TR>
<TD align=middle height=10></TD>
</TR>
<TR>
<TD height=5></TD>
</TR>
<TR>
<TD style="PADDING-RIGHT: 10px; PADDING-LEFT: 10px; PADDING-BOTTOM: 0px; PADDING-TOP: 0px" height=15>
<TABLE cellSpacing=1 cellPadding=0 width="100%" bgColor=#d0d0d0 border=0>
<TR>
<TD>
<TABLE cellSpacing=5 cellPadding=0 width="100%" bgColor=#e7e7e7 border=0>
<TR>
<TD bgColor=#ffffff>
<TABLE cellSpacing=0 cellPadding=0 width="100%" border=0>
<TR>
<TD height=10></TD>
</TR>
<TR>
<TD align=middle height=10>
<TABLE cellSpacing=0 cellPadding=0 width="95%" border=0>
<TR>
<TD width=10>>></TD>
<TD style="PADDING-RIGHT: 0px; PADDING-LEFT: 0px; FONT-WEIGHT: bold; FONT-SIZE: 14px; PADDING-BOTTOM: 0px; PADDING-TOP: 2px; LETTER-SPACING: -0.1em">알려드립니다.!!!</TD>
</TR>
</TABLE>
</TD>
</TR>
<TR>
<TD style="PADDING-RIGHT: 15px; PADDING-LEFT: 15px; PADDING-BOTTOM: 0px; PADDING-TOP: 15px" height=10>
공지사항입니다.공지사항입니다.공지사항입니다.<br />
공지사항입니다.<br />
공지사항입니다.<br />
공지사항입니다.<br />
공지사항입니다.<br />
공지사항입니다.<br />
공지사항입니다.<br />
공지사항입니다.<br />
공지사항입니다.<br />
공지사항입니다.<br />
공지사항입니다.<br />
공지사항입니다.<br />
공지사항입니다.<br />
공지사항입니다.<br />
공지사항입니다.<br />
공지사항입니다.
</TD>
</TR>
<TR>
<TD height=5></TD>
</TR>
</TABLE>
<TABLE cellSpacing=0 cellPadding=0 width="100%" border=0>
<TR>
<TD width="3%" bgColor=#f7f7f7 height=30></TD>
<TD width="6%" bgColor=#f7f7f7><INPUT type=checkbox name=cookie_check></TD>
<TD width="36%" bgColor=#f7f7f7>오늘 하루 그만 보기 </TD>
<TD style="PADDING-RIGHT: 5px; PADDING-LEFT: 0px; PADDING-BOTTOM: 0px; PADDING-TOP: 0px" align=right width="55%" bgColor=#f7f7f7>
<A onfocus=this.blur(); href="javascript
</TD>
</TR>
</TABLE>
</TD>
</TR>
</TABLE>
</TD>
</TR>
</TABLE>
</TD>
</TR>
<TR>
<TD align=middle height=10></TD>
</TR>
</TABLE>
</DIV>
<SCRIPT>
all_banner_open();
</SCRIPT>
연락처 Intent
- 연락처 조회
intent = new Intent(Intent.ACTION_VIEW,

    Uri.parse("content://contacts/people/" +

              String.valueOf(contact.getId())));

startActivity(intent);
- 연락처 등록
intent = new Intent(Intent.ACTION_INSERT,

    Uri.parse("content://contacts/people"));

startActivity(intent);
- 연락처 수정
intent = new Intent(Intent.ACTION_EDIT,

  Uri.parse("content://contacts/people/" +

            String.valueOf(contact.getId())));

startActivity(intent);
- 연락처 삭제
intent = new Intent(Intent.ACTION_DELETE,

    Uri.parse("content://contacts/people/" +

              String.valueOf(contact.getId())));

startActivity(intent);
전화 Intent
- 권한 설정 (AndroidManifest.xml)
전화 걸기         : CALL_PHONE = "android.permission.CALL_PHONE"

긴급 통화         : CALL_PRIVILEGED =

                     "android.permission.CALL_PRIVILEGED"

폰 상태 읽기      : READ_PHONE_STATE =

                    "android.permission.READ_PHONE_STATE"

폰 상태 수정      : MODIFY_PHONE_STATE =

                    "android.permission.MODIFY_PHONE_STATE"

브로드케스팅 수신 : PROCESS_OUTGOING_CALLS =

                    "android.permission.PROCESS_OUTGOING_CALLS"

전화 걸기 이전    : ACTION_NEW_OUTGOING_CALL =

                    "android.intent.action.NEW_OUTGOING_CALL"
- 전화걸기 화면
Intent intent = new Intent(Intent.ACTION_DIAL,

      Uri.parse("tel:" + TelNumber));

startActivity(intent);
- 전화걸기
Intent intent = new Intent(Intent.ACTION_CALL,

       Uri.parse("tel:" + TelNumber));

startActivity(intent);
SMS Intent
- 권한 설정 (AndroidManifest.xml)
수신 모니터링       : RECEIVE_SMS = "android.permission.RECEIVE_SMS"

읽기 가능           : READ_SMS = "android.permission.READ_SMS"

발송 가능           : SEND_SMS = "android.permission.SEND_SMS"

SMS Provider로 전송 : WRITE_SMS = "android.permission.WRITE_SMS"

                    : BROADCAST_SMS = "android.permission.BROADCAST_SMS"
- SMS 발송 화면
Intent intent = new Intent(Intent.ACTION_VIEW);

intent.putExtra("sms_body", "The SMS text");

intent.setType("vnd.android-dir/mms-sms");

startActivity(intent);
- SMS 보내기
Intent intent = new Intent(Intent.ACTION_SENDTO,

       Uri.parse("smsto://" + contact.getHandphone()));

intent.putExtra("sms_body", "The SMS text");

intent.setType("vnd.android-dir/mms-sms");

startActivity(intent);
이메일 Intent
- 이메일 발송 화면
Intent intent = new Intent(Intent.ACTION_SENDTO,

       Uri.parse("mailto:" + contact.getEmail()));

startActivity(intent);
브라우저 Intent
- Browser에서 URL 호출하기
new Intent(Intent.ACTION_VIEW, Uri.parse("http://www.google.com/"));

startActivity(intent);- 브라우저에서 검색
Intent intent = new Intent(Intent.ACT ION_WEB_SEARCH);

intent.putExtra(SearchManager.QUERY, "검색어");

startActivity(intent);
지도 Intent
- 지도 보기
Uri uri = Uri.parse ("geo: 38.00, -35.03");

Intent intent = new Intent(Intent.ACTION_VIEW, uri);

startActivity(intent);
안드로이드 마켓 Intent
- 안드로이드 마켓에서 Apps 검색
Uri uri = Uri.parse("market://search?q=pname:전제_패키지_명");

//--- 예) market://search?q=pname:com.jopenbusiness.android.smartsearch

Intent intent = new Intent(Intent.ACTION_VIEW, uri);

startActivity(intent); - 안드로이드 마켓의 App 상세 화면
Uri uri = Uri.parse("market://details?id=전제_패키지_명");

//--- 예) market://details?id=com.jopenbusiness.android.smartsearch

Intent intent = new Intent(Intent.ACTION_VIEW, uri);

startActivity(intent);
갤럭시S의 Intent
- 패키지명과 클래스명으로 App 호출
intent = new Intent(Intent.ACTION_MAIN);

intent.setComponent(new ComponentName("패키지명", "전체_클래스명"));

startActivity(intent);
- 전화, SMS
- 전화번호부 : com.android.contacts, com.sec.android.app.contacts.PhoneBookTopMenuActivity
- 전화 : com.sec.android.app.dialertab, com.sec.android.app.dialertab.DialerTabActivity
- 최근기록 : com.sec.android.app.dialertab, com.sec.android.app.dialertab.DialerTabDialerActivity
- 메시지 : com.sec.mms, com.sec.mms.Mms
- 이메일 : com.android.email, com.android.email.activity.Welcome
- 일정 : com.android.calendar, com.android.calendar.LaunchActivity
- 인터넷 : com.android.browser, com.android.browser.BrowserActivity
- Google의 Android용 앱
- 검색 : com.google.android.googlequicksearchbox, com.google.android.googlequicksearchbox.SearchActivity
- 음성 검색 : com.google.android.voicesearch, com.google.android.voicesearch.RecognitionActivity
- Gmail : com.google.android.gm, com.google.android.gm.ConversationListActivityGmail
- 지도 : com.google.android.apps.maps, com.google.android.maps.MapsActivity
- 위치찾기 : com.google.android.apps.maps, com.google.android.maps.LatitudeActivity
- YouTube : com.google.android.youtube, com.google.android.youtube.HomeActivity
- 토크 : com.google.android.talk, com.google.android.talk.SigningInActivity
- Goggles : com.google.android.apps.unveil, com.google.android.apps.unveil.CaptureActivity
- Google 번역 : com.google.android.apps.translate, com.google.android.apps.translate.HomeActivity
- Reader : com.google.android.apps.reader, com.google.android.apps.unveil.CaptureActivity
- Voice : com.google.android.apps.googlevoice, com.google.android.apps.googlevoice.SplashActivity
- Google 별지도 : com.google.android.stardroid, com.google.android.stardroid.activities.SplashScreenActivity
- 카메라 : com.sec.android.app.camera, com.sec.android.app.camera.Camera
- TV : com.sec.android.app.dmb, com.sec.android.app.dmb.activity.DMBFullScreenView
- Android 관리
- 환경 설정 : com.android.settings, com.android.settings.Settings
- 작업 관리자 : com.sec.android.app.controlpanel, com.sec.android.app.controlpanel.activity.JobManagerActivity
- 마켓 : com.android.vending, com.android.vending.AssetBrowserActivity
Uri uri = Uri.parse("http://www.google.com");
Intent it = new Intent(Intent.ACTION_VIEW,uri);
startActivity(it);
// 구글맵 띄우기
Uri uri = Uri.parse("geo:38.899533,-77.036476");
Intent it = new Intent(Intent.Action_VIEW,uri);
startActivity(it);
// 구글 길찾기 띄우기
Uri uri = Uri.parse("http://maps.google.com/maps?f=d&saddr=출발지주소&daddr=도착지주소&hl=ko");
Intent it = new Intent(Intent.ACTION_VIEW,URI);
startActivity(it);
// 전화 걸기
Uri uri = Uri.parse("tel:xxxxxx");
Intent it = new Intent(Intent.ACTION_DIAL, uri);
startActivity(it);
Uri uri = Uri.parse("tel.xxxxxx");
Intent it = new Intent(Intent.ACTION_CALL,uri);
// 퍼미션을 잊지 마세요. <uses-permission id="android.permission.CALL_PHONE" />
// SMS/MMS 발송
Intent it = new Intent(Intent.ACTION_VIEW);
it.putExtra("sms_body", "The SMS text");
it.setType("vnd.android-dir/mms-sms");
startActivity(it);
// SMS 발송
Uri uri = Uri.parse("smsto:0800000123");
Intent it = new Intent(Intent.ACTION_SENDTO, uri);
it.putExtra("sms_body", "The SMS text");
startActivity(it);
// MMS 발송
Uri uri = Uri.parse("content://media/external/images/media/23");
Intent it = new Intent(Intent.ACTION_SEND);
it.putExtra("sms_body", "some text");
it.putExtra(Intent.EXTRA_STREAM, uri);
it.setType("image/png");
startActivity(it);
// 이메일 발송
Uri uri = Uri.parse("mailto:xxx@abc.com");
Intent it = new Intent(Intent.ACTION_SENDTO, uri);
startActivity(it);
Intent it = new Intent(Intent.ACTION_SEND);
it.putExtra(Intent.EXTRA_EMAIL, "me@abc.com");
it.putExtra(Intent.EXTRA_TEXT, "The email body text");
it.setType("text/plain");
startActivity(Intent.createChooser(it, "Choose Email Client"));
Intent it = new Intent(Intent.ACTION_SEND);
String[] tos = {"me@abc.com"};
String[] ccs = {"you@abc.com"};
it.putExtra(Intent.EXTRA_EMAIL, tos);
it.putExtra(Intent.EXTRA_CC, ccs);
it.putExtra(Intent.EXTRA_TEXT, "The email body text");
it.putExtra(Intent.EXTRA_SUBJECT, "The email subject text");
it.setType("message/rfc822");
startActivity(Intent.createChooser(it, "Choose Email Client"));
// extra 추가하기
Intent it = new Intent(Intent.ACTION_SEND);
it.putExtra(Intent.EXTRA_SUBJECT, "The email subject text");
it.putExtra(Intent.EXTRA_STREAM, "file:///sdcard/mysong.mp3");
sendIntent.setType("audio/mp3");
startActivity(Intent.createChooser(it, "Choose Email Client"));
// 미디어파일 플레이 하기
Intent it = new Intent(Intent.ACTION_VIEW);
Uri uri = Uri.parse("file:///sdcard/song.mp3");
it.setDataAndType(uri, "audio/mp3");
startActivity(it);
Uri uri = Uri.withAppendedPath(
MediaStore.Audio.Media.INTERNAL_CONTENT_URI, "1");
Intent it = new Intent(Intent.ACTION_VIEW, uri);
startActivity(it);
// 설치 어플 제거
Uri uri = Uri.fromParts("package", strPackageName, null);
Intent it = new Intent(Intent.ACTION_DELETE, uri);
startActivity(it);
// APK파일을 통해 제거하기
Uri uninstallUri = Uri.fromParts("package", "xxx", null);
returnIt = new Intent(Intent.ACTION_DELETE, uninstallUri);
// APK파일 설치
Uri installUri = Uri.fromParts("package", "xxx", null);
returnIt = new Intent(Intent.ACTION_PACKAGE_ADDED, installUri);
// 음악 파일 재생
Uri playUri = Uri.parse("file:///sdcard/download/everything.mp3");
returnIt = new Intent(Intent.ACTION_VIEW, playUri);
// 첨부파일을 추가하여 메일 보내기
Intent it = new Intent(Intent.ACTION_SEND);
it.putExtra(Intent.EXTRA_SUBJECT, "The email subject text");
it.putExtra(Intent.EXTRA_STREAM, "file:///sdcard/eoe.mp3");
sendIntent.setType("audio/mp3");
startActivity(Intent.createChooser(it, "Choose Email Client"));
// 마켓에서 어플리케이션 검색
Uri uri = Uri.parse("market://search?q=pname:pkg_name");
Intent it = new Intent(Intent.ACTION_VIEW, uri);
startActivity(it);
// 패키지명은 어플리케이션의 전체 패키지명을 입력해야 합니다.
// 마켓 어플리케이션 상세 화면
Uri uri = Uri.parse("market://details?id=어플리케이션아이디");
Intent it = new Intent(Intent.ACTION_VIEW, uri);
startActivity(it);
// 아이디의 경우 마켓 퍼블리싱사이트의 어플을 선택후에 URL을 확인해보면 알 수 있습니다.
// 구글 검색
Intent intent = new Intent();
intent.setAction(Intent.ACTION_WEB_SEARCH);
intent.putExtra(SearchManager.QUERY,"searchString")
startActivity(intent);
1 2 3 4 5 6 7 8 9 10 11 12 13 14 15 16 17 18 19 20 21 22 23 24 25 26 27 28 29 30 31 32 33 34 35 36 37 38 39 40 41 42 43 44 45 46 47 48 49 50 51 52 53 54 55 56 57 58 59 60 61 62 63 64 65 66 67 68 69 70 71 72 73 74 75 76 77 78 79 80 81 82 83 84 85 86 87 88 89 90 91 92 93 94 95 96 97 98 99 100 101 102 103 104 105 106 107 108 109 110 111 112 113 114 115 116 117 118 119 120 121 122 123 124 125 126 127 128 129 130 131 132 133 134 135 136 137 138 139 140 141 142 143 144 | // 웹페이지 띄우기Intent it = new Intent(Intent.ACTION_VIEW,uri);startActivity(it);// 구글맵 띄우기Uri uri = Uri.parse("geo:38.899533,-77.036476");Intent it = new Intent(Intent.Action_VIEW,uri);startActivity(it); // 구글 길찾기 띄우기Intent it = new Intent(Intent.ACTION_VIEW,URI);startActivity(it);// 전화 걸기Uri uri = Uri.parse("tel:xxxxxx");Intent it = new Intent(Intent.ACTION_DIAL, uri); startActivity(it); Uri uri = Uri.parse("tel.xxxxxx");Intent it = new Intent(Intent.ACTION_CALL,uri);// 퍼미션을 잊지 마세요. <uses-permission id="android.permission.CALL_PHONE" />// SMS/MMS 발송Intent it = new Intent(Intent.ACTION_VIEW); it.putExtra("sms_body", "The SMS text"); it.setType("vnd.android-dir/mms-sms"); startActivity(it); // SMS 발송Uri uri = Uri.parse("smsto:0800000123"); Intent it = new Intent(Intent.ACTION_SENDTO, uri); it.putExtra("sms_body", "The SMS text"); startActivity(it); // MMS 발송Intent it = new Intent(Intent.ACTION_SEND); it.putExtra("sms_body", "some text"); it.putExtra(Intent.EXTRA_STREAM, uri); it.setType("image/png"); startActivity(it); // 이메일 발송Uri uri = Uri.parse("mailto:xxx@abc.com");Intent it = new Intent(Intent.ACTION_SENDTO, uri);startActivity(it);Intent it = new Intent(Intent.ACTION_SEND); it.putExtra(Intent.EXTRA_EMAIL, "me@abc.com"); it.putExtra(Intent.EXTRA_TEXT, "The email body text"); it.setType("text/plain"); startActivity(Intent.createChooser(it, "Choose Email Client")); Intent it = new Intent(Intent.ACTION_SEND); String[] tos = {"me@abc.com"}; String[] ccs = {"you@abc.com"}; it.putExtra(Intent.EXTRA_EMAIL, tos); it.putExtra(Intent.EXTRA_CC, ccs); it.putExtra(Intent.EXTRA_TEXT, "The email body text"); it.putExtra(Intent.EXTRA_SUBJECT, "The email subject text"); it.setType("message/rfc822"); startActivity(Intent.createChooser(it, "Choose Email Client")); // extra 추가하기Intent it = new Intent(Intent.ACTION_SEND); it.putExtra(Intent.EXTRA_SUBJECT, "The email subject text"); sendIntent.setType("audio/mp3"); startActivity(Intent.createChooser(it, "Choose Email Client"));// 미디어파일 플레이 하기Intent it = new Intent(Intent.ACTION_VIEW);it.setDataAndType(uri, "audio/mp3");startActivity(it);Uri uri = Uri.withAppendedPath( MediaStore.Audio.Media.INTERNAL_CONTENT_URI, "1"); Intent it = new Intent(Intent.ACTION_VIEW, uri); startActivity(it); // 설치 어플 제거Uri uri = Uri.fromParts("package", strPackageName, null); Intent it = new Intent(Intent.ACTION_DELETE, uri); startActivity(it);// APK파일을 통해 제거하기Uri uninstallUri = Uri.fromParts("package", "xxx", null);returnIt = new Intent(Intent.ACTION_DELETE, uninstallUri);// APK파일 설치Uri installUri = Uri.fromParts("package", "xxx", null);returnIt = new Intent(Intent.ACTION_PACKAGE_ADDED, installUri);// 음악 파일 재생returnIt = new Intent(Intent.ACTION_VIEW, playUri);// 첨부파일을 추가하여 메일 보내기Intent it = new Intent(Intent.ACTION_SEND); it.putExtra(Intent.EXTRA_SUBJECT, "The email subject text"); sendIntent.setType("audio/mp3"); startActivity(Intent.createChooser(it, "Choose Email Client"));// 마켓에서 어플리케이션 검색Intent it = new Intent(Intent.ACTION_VIEW, uri); startActivity(it); // 패키지명은 어플리케이션의 전체 패키지명을 입력해야 합니다.// 마켓 어플리케이션 상세 화면Intent it = new Intent(Intent.ACTION_VIEW, uri); startActivity(it);// 아이디의 경우 마켓 퍼블리싱사이트의 어플을 선택후에 URL을 확인해보면 알 수 있습니다.// 구글 검색Intent intent = new Intent();intent.setAction(Intent.ACTION_WEB_SEARCH);intent.putExtra(SearchManager.QUERY,"searchString")startActivity(intent); |
* 안드로이드을빨리이해하기위한방법
1. OpenSource활용
- http://code.google.com/hosting/
- http://google.com/codesearch
2. Reverse Engineering 활용하여 학습하기
- 자바 클래스 리버싱

- 안드로이드 실행파일 구조와 리버싱


* APK파일 디컴파일(Decompile)하는 방법
1. 디컴파일을 위한 툴 설치
1.ApkTool
- 다운로드 : http://code.google.com/p/android-apktool/downloads/list
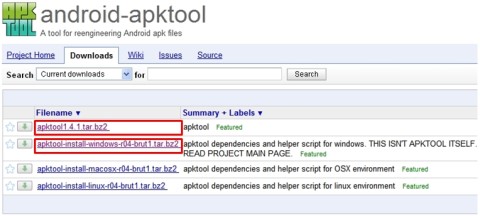
- 압축풀기 : android-sdk가 설치된 platform-tools디렉토리안에 apktool디렉토리를 만들어 압축을 푼다.
apktool1.4.1.tar.bz2
apktool-install-windows-r04-brut1.tar.bz2
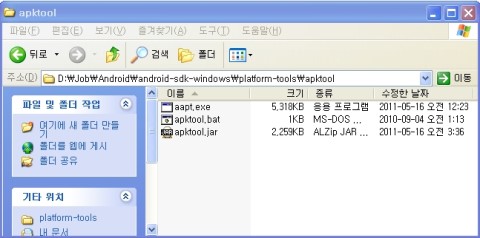
2.Dex2Jar
- 다운로드 : http://code.google.com/p/dex2jar/downloads/list

- 압축풀기 : android-sdk가 설치된 platform-tools디렉토리안에 dex2jar디렉토리를 만들어 압축을 푼다.
dex2jar-0.0.7.10-SNAPSHOT.zip
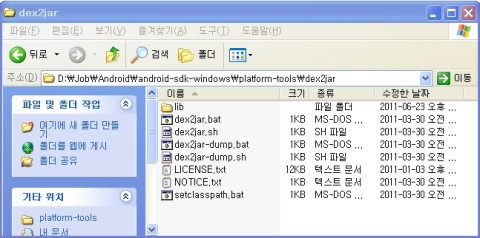
3.Java Decompiler
- 다운로드 : http://java.decompiler.free.fr/?q=jdgui
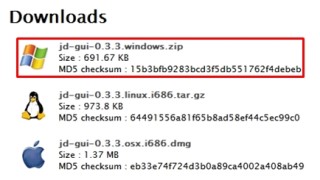
- 압축풀기 : 실행하기 편한 곳에 압축을 풀어 놓는다.
2. 환경변수 잡기
- adb, apktool, dex2jar 명령어를 사용하기 위한 환경변수를 잡는다.
%ANDROID_SDK%\platform-tools
%ANDROID_SDK%\platform-tools\apktool
%ANDROID_SDK%\platform-tools\dex2jar
 | 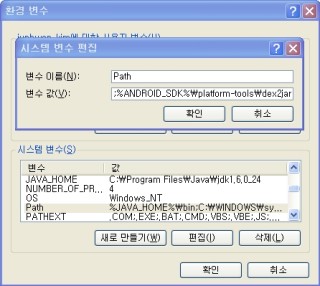 |
3. apk 파일 추출
- 폰에 설치된 모든 패키리를 리스트로 보인다.

- 리스트 중에 디컴파일 할 APK파일을 정한다.

- APK파일을 추출한다. (adb shell을 종료 후 수행한다.)

4. ApkTool 실행 (java파일 외 xml, image, db등을 추출할 수 있다.)
- apktool 명령어를 사용하여 apk파일에 있는 파일을 디코딩하여 out폴더에 내보낸다.
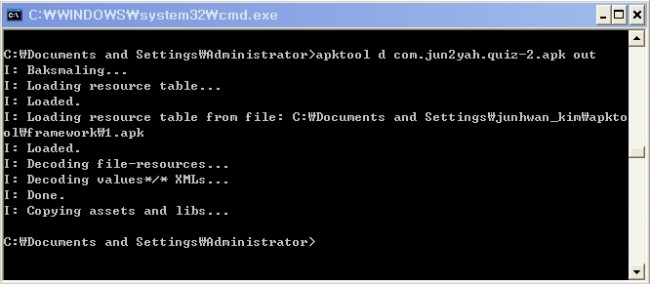
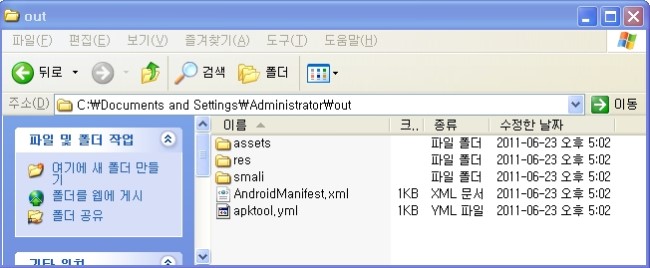
- xml파일을 열어 내용을 확인한다.
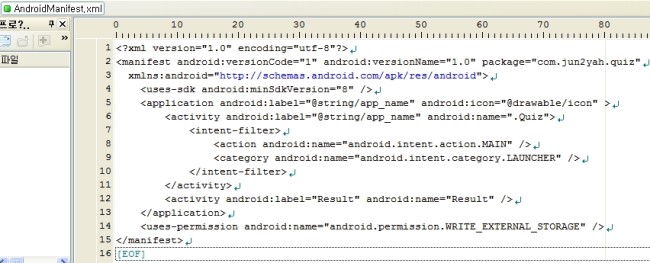
5. Dex2Jar 실행 (Java파일을 추출할 수 있다.)
- apk파일의 확장자를 zip으로 변경한다.

- 추출한 zip파일의 압축을 풀어 classes.dex 파일을 추출한다.

- Dex2Jar를 실행한다.

- Dex2Jar를 실행하면 아래 jar파일이 생긴다.

6. JD-GDI 실행
- JD-GDI실행하여 classes.dex.dex2jar파일을 열어 소스를 분석한다.
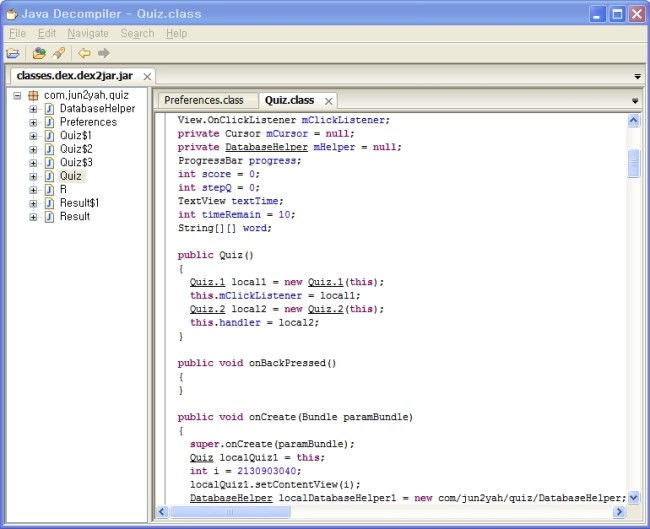
7. Enterprise Architect를 이용하여 클래스 다이어그램으로 분석한다.
- 다운로드 : http://www.sparxsystems.com.au/products/ea/trial.html

- 설치

- 실행

- Java Decompiler에서 open할 파일을 추출한다.

- zip파일을 압축을 푼다.

- Enterprise Architect에서 classes.dex.dex2jar.src디렉토리를 import 한다.
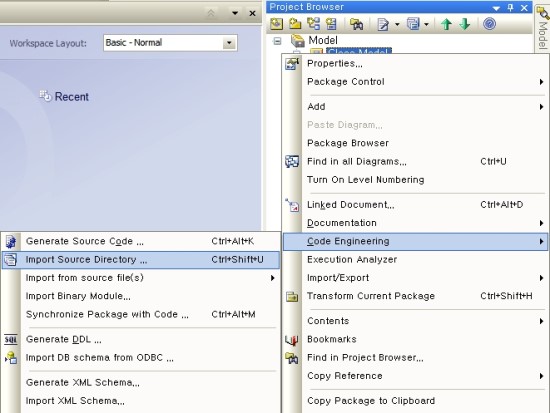
- 클래스 다이어그램을 보고 분석한다.
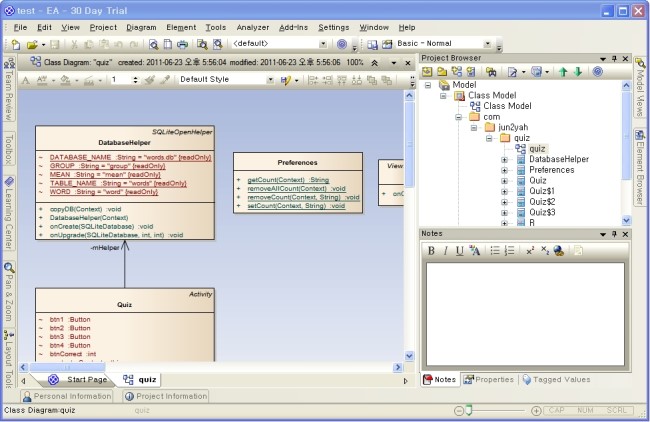
-----------------------------------------------------------------------------------------------------------------------
제 11회 한국자바개발자 컨퍼런스에서 트랙1, 3번째 세션에서 Reverse Engineering, 안드로이드 학습이란 주제로 발표를 진행합니다.
리버싱이 무엇인지, 안드로이드 리버싱을 통해서 어떻게 학습을 할 수 있는지 다양한 도구와 팁들을 소개합니다.
학습을 목적으로 리버스엔지니어링이 허용되지만 기술을 복제 유혹을 받을 수도 있습니다.
법적이나, 윤리적으로 문제가 된다는 것을 명심하고, 공부한 내용을 서로 공유하며 미소 지을 수 있는 개발문화가 되길 바래봅니다. :D
발표자료와 함께 사용된 동영상 공유합니다.
발표자료 : Reverse Engineering, 안드로이드 학습
자바 클래스 리버싱
안드로이드 실행파일 구조와 리버싱
Reverse Engineering 활용한 학습 예제
- 분석할 앱선정과 APK 파일 추출
- 디컴파일 후 분석
- 클래스 다이어그램으로 - Enterprise Architect
- 의존성 검사를 통해 쉽게 - xDepend
### 쓴건 : 원격서버의 Virtualbox 웹관리를 위한 Phpvirtualbox 설치
### 쓴이 : 권성재 (nonots@hanmail.net, http://www.badaweb.co.kr)
### 쓴때 : 2011-12-13
###########################################################################
### 환경
- CentOS 5.x 64비트
- 아파치 2.2, PHP 5.2
- X 윈도우(GUI) 없이 텍스트모드(TUI)로 서버 실행중
1) 서버 CPU 가 가상화기술을 지원하는지 확인. 지원 안한다면 포기.
# egrep '(vmx|svm)' /proc/cpuinfo
2) php 확장기능에 soap, json 이 포함되어 있는지 확인. 없다면 추가 설치.
php 버전도 5.1 이상이어야 한다.
# php -i | egrep -i '(soap|json)'
3) dkms 패키지 설치
아래 링크에서 다운받아 설치
- http://rpmfind.net/linux/rpm2html/search.php?query=dkms
- http://linux.dell.com/dkms/permalink/
# rpm -Uvh dkms-~~~.rpm
4) VirtualBox 4.1 및 확장팩 설치
-http://download.virtualbox.org/virtualbox/
글쓰는 현재 최신버전이 4.1.6 이다. 확장팩도 같이 다운받는다
# rpm -Uvh VirtualBox-4.1-4.1.6_74727_rhel5-1.x86_64.rpm
-확장팩 설치
# VBoxManage extpack install Oracle_VM_VirtualBox_Extension_Pack-4.1.6-74713.vbox-extpack
부가기능 설치 위한 VBoxGuestAdditions_4.1.6.iso 파일도
다운받아 놓는다.
- vbox 사용자 추가하고 비밀번호 정한다. 비번을 kawkf123 이라고 하자
# useradd -g vboxusers vbox
# passwd vbox
만약 홈디렉토리를 /home/vbox 가 아니라 용량큰 다른 곳에 마운트한
/data/vbox 와 같은 위치를 사용한다면 -d /data/vbox 와 같이 추가
- /etc/vbox/vbox.cfg 파일 생성
[root@home3 ~]# cat /etc/vbox/vbox.cfg
VBOXWEB_USER=vbox
VBOXWEB_HOST=222.231.xxx.xxx
VBOXWEB_PORT=18083
VBOXWEB_LOGFILE=/var/log/vbox.log
와 같이 하고 반드시 /var/log/vbox.log 를 만들어줌
# touch /var/log/vbox.log
# chmod 600 /var/log/vbox.log
# chown vbox.vboxusers /var/log/vbox.log
이렇게 안만들어주고 데몬시작하니 말도 없이 까칠하게 생깜.
VBOXWEB_HOST=222.231.xxx.xxx 이 부분을
VBOXWEB_HOST=0.0.0.0 으로 하기도 한담.
18083 포트가 막혀있으면 열어준다.
5) Phpvirtualbox 4.1 설치
- http://code.google.com/p/phpvirtualbox/
위 링크에서 phpvirtualbox-4.1-5.zip 다운받아서 웹루트 적당한 곳에
압축을 푼다.
만약 Virtualbox 4.0 이 설치되었다면 phpvirtualbox 도 4.0 버전대를 사용
해야 할꺼다.
config.php-sample 파일을 config.php 로 복사한 후 편집기로 열어서 상단에
var $username = 'vbox';
var $password = 'kawkf123';
var $location = 'http://222.231.xxx.xxx:18083/';`
여기 username,password 는 4)에서 생성한 리눅스 서버 vbox 계정정보다.
이 웹접속 위치가 http://www.mysite.com/phpvirtualbox/index.php 라고 하자
어떤데서는 아래 명령어 줘야한다고함. vbox 계정으로 전환한 뒤 해야하거나.
# VBoxManage setproperty websrvauthlibrary null
6) 접속방법
# /etc/init.d/vboxballoonctrl-service start
# /etc/init.d/vboxdrv start
# /etc/init.d/vboxweb-service start
와 같이 데몬을 시작한다.
만약 위 3)에서 dkms 커널모듈이 설치가 불안정하게 되었다면
# /etc/init.d/vboxdrv setup 로 재설치할 수도 있다.
위 3 개 데몬 실행에 오류가 없고 18083 포트가 열렸고,프로세스가
# ps aux |grep vbox
vbox 32002 0.0 0.1 149588 4268 ? Sl 18:26 0:00 /usr/lib/virtualbox/vboxwebsrv --background -H 222.231.xxx.xxx -p 18083 -F /var/log/vbox.log
vbox 32007 0.0 0.0 119560 2200 ? S 18:26 0:00 /usr/lib/virtualbox/VBoxXPCOMIPCD
vbox 32012 0.0 0.1 140076 5620 ? Sl 18:26 0:00 /usr/lib/virtualbox/VBoxSVC --auto-shutdown
와 같이 보이면 일단 된거다.
http://www.mysite.com/phpvirtualbox/index.php 와 같이 접속하면
로그인 아이디 비번 물을꺼다.
여기에 위에서 vbox 서버 계정 정보를 넣으려고 삽질하면 안.된.다. 나처럼 -_-;;
아이디 비번에 모두 admin 이라고 넣어야 한다.
로그인후 메뉴에서 admin 비밀번호를 바꾸면 된다.
보이는 화면은 그냥 virtualbox 와 비슷할꺼다.
..
이제 알아서 직관적으로 사용하면 된다.
### 참고
http://codefat.com/tag/phpvirtualbox/
http://www.oss.kr/12792
'=================================================================== Dim StrLen, TmpStr, i, Midcnt, Start, Surplus '
################################################################################## '
################################################################################## '
################################################################################## FUNCTION autolink(CONTENT) '
################################################################################## '################################################################################## '################################################################################## If chkCnt < chkLen then End Function '################################################################################## '################################################################################## '################################################################################## Function makeNull(str) '################################################################################## Function stripHTML(strHTML, patrn) objRegExp.IgnoreCase = True 'objRegExp.Pattern = "<.+?>" '' 태그완전히없앰 strOutput = objRegExp.Replace(strHTML, "") stripHTML = strOutput Set objRegExp = Nothing '################################################################################## 별건 아니구요..그냥 가끔 디버깅시에 쓰는
함수에요 Dim errLoop ########폼값 확인할때################### Dim item | |
| 첨부파일이 없습니다. |
몇 번 언급한 적이 있는 Coffeescript를 사용했습니다.
[index.html]
<!DOCTYPE html>
<html xmlns='http://www.w3.org/1999/xhtml'>
<head>
<title>Checkbox Filter</title>
<meta http-equiv="content-type" content="text/html; charset=utf-8" />
<link href="stylesheet.css" media="screen" rel="stylesheet" type="text/css" />
<script src="https://ajax.googleapis.com/ajax/libs/jquery/1.6.4/jquery.min.js" type="text/javascript"></script>
<script src="http://jashkenas.github.com/coffee-script/extras/coffee-script.js" type="text/javascript"></script>
<script src="application.coffee" type="text/coffeescript"></script>
</head>
<body>
<div id="container">
<form method="post" action="/">
<label for="input-filter">Filter:</label>
<input id="input-filter" type="text" name="filter" />
<ul>
<li>
<input id="id_1" type="checkbox" name="ids[]" value="1" />
<label for="id_1">#1 - AA</label>
</li>
<li>
<input id="id_2" type="checkbox" name="ids[]" value="2" />
<label for="id_2">#2 - BA</label>
</li>
<li>
<input id="id_3" type="checkbox" name="ids[]" value="3" />
<label for="id_3">#3 - AB</label>
</li>
<li>
<input id="id_4" type="checkbox" name="ids[]" value="4" />
<label for="id_4">#4 - BB</label>
</li>
<li>
<input id="id_5" type="checkbox" name="ids[]" value="5" />
<label for="id_5">#5 - ABC</label>
</li>
</ul>
</form>
</div>
</body>
</html>
[stylesheet.css]
body {
font-size: 12px;
background: #FFF;
color: #333;
margin: 0;
}
#container {
margin: 10px auto;
width: 600px;
padding: 10px;
}
[application,coffee]
$ ->
$('form').submit ->
false
$('input[name=filter]').live 'keyup', ->
query = $(this).val().toLowerCase()
if $(query).is(':blank')
$('form li').show()
else
$('form li').each (i, item) ->
text = $(item).find('label').text().toLowerCase()
if text.search(query) < 0
$(item).hide()
else
$(item).show()
<?
$g4_path = ".";
include_once("$g4_path/common.php");
include_once("$g4[path]/lib/mw.builder.lib.php");
if($shotbirdie_tkey){
$ti_de = urldecode($shotbirdie_tkey);
$g4[title] = "자료실 > 토렌트검색 : $ti_de";
}else{
$g4[title] = "자료실 > 토렌트검색";
}
@include_once("$g4[path]/head.php");
?>
<script language="Javascript" type="text/Javascript">
<!--
function MM_popupMsg(msg) { //v1.0
alert(msg);
}
//-->
</script>
<style>
.jyGuideBox {margin-top:30px; padding:20px; background:#f2f2f2;}
.jyGuideBox .txt_title {padding-left:20px; height:17px; line-height:19px; font-weight:bold; color:#333; background:url('./img/ico_sprites_bule.gif') no-repeat 2px 2px;}
.jyGuideBox ul {padding-top:8px;}
.jyGuideBox li {padding-left:20px; height:18px; line-height:20px; font-size:11px; color:#999; list-style:none; background:url('./img/ico_sprites_bule.gif') no-repeat 10px -30px;}
</style>
<!--상단검색-->
<table width="730" border="0" align="center" cellpadding="0" cellspacing="0">
<tr>
<td width="29"><img src="http://soncook2.cdn2.cafe24.com/shotbirdie/search_left.gif" width="29" height="79"></td>
<td valign="top" background="http://soncook2.cdn2.cafe24.com/shotbirdie/search_bodybg.gif"><table width="100%" border="0" cellspacing="0" cellpadding="0">
<tr>
<td height="40"><table width="100%" border="0" cellspacing="0" cellpadding="0">
<tr>
<td width="3" height="6"></td>
<td height="6"></td>
</tr>
<tr>
<td> </td>
<td><table width="100%" border="0" cellspacing="0" cellpadding="0">
<tr>
<td width="150" class="search_txt">토렌트검색</td>
<td class="search_txt"><div align="right">
<?
$k01 = urlencode("1박2일");
$k02 = urlencode("무한도전");
$k03 = urlencode("런닝맨");
$k04 = urlencode("남자의자격");
$k05 = urlencode("영어공부");
$k06 = urlencode("음악");
$k07 = urlencode("성인");
$k08 = urlencode("서식");
$k09 = urlencode("자막");
$k10 = urlencode("강좌");
$k11 = urlencode("나는가수다");
?>
<a href='<?=$PHP_SELF?>?shotbirdie_tkey=<?=$k05?>'><span class='search_txt'><u>영어공부</u></span></a> |
<a href='<?=$PHP_SELF?>?shotbirdie_tkey=<?=$k11?>'><span class='search_txt'><u>나는 가수다</u></span></a> |
<a href='<?=$PHP_SELF?>?shotbirdie_tkey=<?=$k01?>'><span class='search_txt'><u>1박2일</u></span></a> |
<a href='<?=$PHP_SELF?>?shotbirdie_tkey=<?=$k02?>'><span class='search_txt'><u>무한도전</u></span></a> |
<a href='<?=$PHP_SELF?>?shotbirdie_tkey=<?=$k03?>'><span class='search_txt'><u>런닝맨</u></span></a> |
<a href='<?=$PHP_SELF?>?shotbirdie_tkey=<?=$k04?>'><span class='search_txt'><u>남자의자격</u></span></a> |
<a href='<?=$PHP_SELF?>?shotbirdie_tkey=<?=$k06?>'><span class='search_txt'><u>음악</u></span></a> |
<a href='<?=$PHP_SELF?>?shotbirdie_tkey=<?=$k07?>'><span class='search_txt'><u>성인</u></span></a> |
<a href='<?=$PHP_SELF?>?shotbirdie_tkey=<?=$k08?>'><span class='search_txt'><u>무료서식</u></span></a> |
<a href='<?=$PHP_SELF?>?shotbirdie_tkey=<?=$k09?>'><span class='search_txt'><u>자막</u></span></a> |
<a href='<?=$PHP_SELF?>?shotbirdie_tkey=<?=$k10?>'><span class='search_txt'><u>강좌</u></span></a>
</div></td>
</tr>
</table></td>
</tr>
</table></td>
</tr>
<tr>
<td height="39"><table width="100%" border="0" cellspacing="0" cellpadding="0">
<form type="get" action="<?=$PHP_SELF_SELF?>">
<tr>
<td><input name=shotbirdie_tkey maxlength=30 itemname="토렌트 검색어" required value='<?=$shotbirdie_tkey?>' style="width:620; height:22px;"></td>
<td width="60"><div align="right">
<input name="image" type=image src="http://soncook2.cdn2.cafe24.com/shotbirdie/search_bt.gif" align=absmiddle width="49" height="21" border=0>
</div></td>
</tr>
</form>
</table></td>
</tr>
</table></td>
<td width="20"><img src="http://soncook2.cdn2.cafe24.com/shotbirdie/search_right.gif" width="20" height="79"></td>
</tr>
</table>
<!--상단검색-->
<center>매일 10~11시, 15~16시, 20~23시는 비회원 다운로드 가능(회원은 언제나 가능)</center>
<?
if($shotbirdie_tkey == ''){ }else{
require './lib/Snoopy.class.php';
ini_set("allow_url_fopen","1");
switch($sort_code){
case 'a': //최근
$sort = "a/d/";
$scolor01 = "style='color: #990000;'";
break;
case 'c': //인기
$sort = "c/d/";
$scolor02 = "style='color: #990000;'";
break;
case 's': //시더
$sort = "s/d/";
$scolor03 = "style='color: #990000;'";
break;
case 'n': //이름
$sort = "n/d/";
$scolor04 = "style='color: #990000;'";
break;
case 'z': //크기
$sort = "z/d/";
$scolor05 = "style='color: #990000;'";
break;
default: //인기
$sort = "c/d/";
$scolor02 = "style='color: #990000;'";
$tpage = 1;
break;
}
switch($tpage){
case '1':
$tcolor01 = "style='color: #990000; font-weight:bold;'";
break;
case '2':
$tcolor02 = "style='color: #990000; font-weight:bold;'";
break;
case '3':
$tcolor03 = "style='color: #990000; font-weight:bold;'";
break;
default:
$tcolor02 = "style='color: #990000; font-weight:bold;'";
break;
}
$url = "http://bitsnoop.com/search/all/".$shotbirdie_tkey."/".$sort.$tpage."/?fmt=rss";
$snoopy = new Snoopy;
$snoopy->fetch($url);
$xml = @simplexml_load_string($snoopy->results);
$listct = '30'; //첫 파싱후 2번째부터는 수량조절용으로 사용(최적화를 위해)
//$listct = count($xml->item);
//테이블상단
echo "
<br><br>
<table width='730' height='30' border='0' align='center' cellpadding='0' cellspacing='0'>
<tr>
<td>
<table width='100%' border='0' cellspacing='5' cellpadding='0'>
<tr>
<td width='50%' align='left'><a href='./bbs/board.php?bo_table=notice&wr_id=3' target='_blank'><font color='#990000'>토렌트 설치 및 사용법</a></td>
<td width='50%' align='right'>
<!--순서-->
<a href='$PHP_SELF_SELF?shotbirdie_tkey=$shotbirdie_tkey&sort_code=a&tpage=$tpage'><span $scolor01>최신순</span></a> |
<a href='$PHP_SELF_SELF?shotbirdie_tkey=$shotbirdie_tkey&sort_code=c&tpage=$tpage'><span $scolor02>인기순</span></a> |
<a href='$PHP_SELF_SELF?shotbirdie_tkey=$shotbirdie_tkey&sort_code=s&tpage=$tpage'><span $scolor03>시드순</span></a> |
<a href='$PHP_SELF_SELF?shotbirdie_tkey=$shotbirdie_tkey&sort_code=n&tpage=$tpage'><span $scolor04>이름순</span></a> |
<a href='$PHP_SELF_SELF?shotbirdie_tkey=$shotbirdie_tkey&sort_code=z&tpage=$tpage'><span $scolor05>크기순</span></a>
</td>
</tr>
</table>
</td>
</tr>
</table>
<table width='730' border='0' align='center' cellpadding='0' cellspacing='0'>
<tr>
<td><table width='100%' border='0' cellspacing='0' cellpadding='0'>
<tr>
<td height='1' bgcolor='BFBFBF'></td>
</tr>
<tr>
<td height='32' bgcolor='FAFAFA'><table width='100%' border='0' cellspacing='0' cellpadding='0'>
<tr>
<td width='38' align='center'>번호</td>
<td width='500' align='center'>제목</td>
<td width='66' align='center'>크기</td>
<td width='38' align='center'>시드</td>
<td width='44' align='center'>마그넷</td>
<td width='44' align='center'>토렌트</td>
</tr>
</table></td>
</tr>
<tr>
<td height='1' bgcolor='EDEDED'></td>
</tr>
</table></td>
</tr>
<tr>
<td>
";
for($i=0; $i<$listct; $i++){
$wr_subject[$i] = $xml->channel->item[$i]->title;
$category[$i] = $xml->channel->item[$i]->category;
$link[$i] = $xml->channel->item[$i]->link;
$pubDate[$i] = $xml->channel->item[$i]->pubDate;
$numSeeders[$i] = $xml->channel->item[$i]->numSeeders;
$numLeechers[$i] = $xml->channel->item[$i]->numLeechers;
$numFiles[$i] = $xml->channel->item[$i]->numFiles;
$numComments[$i] = $xml->channel->item[$i]->numComments;
$size[$i] = $xml->channel->item[$i]->size;
$fileName[$i] = $xml->channel->item[$i]->torrent->fileName;
$url_join[$i] = 'http://torrage.com/torrent/'.$fileName[$i];
$contentLength[$i] = $xml->channel->item[$i]->torrent->contentLength;
$infoHash[$i] = $xml->channel->item[$i]->torrent->infoHash;
$magnetURI[$i] = $xml->channel->item[$i]->torrent->magnetURI;
$wr_content[$i] = $xml->channel->item[$i]->description;
//echo "$wr_subject / $fileName / $url_join<br>";
//순번
$num = $i+1;
//파일용량
$size[$i] = round(($size[$i] / 1024)/1024);
//회원가입에 따른차등
if(!$member['mb_id']){
//안내메세지
$tmsg = "매일 10~11시, 15~16시, 20~23시는 비회원 다운로드 가능하세요^^";
$timeinfo = getdate(time());
if(($timeinfo[hours] >= '10' and $timeinfo[hours] < '11') or ($timeinfo[hours] >= '15' and $timeinfo[hours] < '16') or ($timeinfo[hours] >= '20' and $timeinfo[hours] < '23')){
$magnetURI_m[$i] = "<a href='$magnetURI[$i]' target='_blank' onClick=\"MM_popupMsg('$tmsg')\"><img src='http://soncook2.cdn2.cafe24.com/shotbirdie/torrent_img01.GIF' border='0'></a>";
$url_join_m[$i] = "<a href='$url_join[$i]' target='_blank' onClick=\"MM_popupMsg('$tmsg')\"><img src='http://soncook2.cdn2.cafe24.com/shotbirdie/torrent_img02.GIF' border='0'></a>";
}else{
$magnetURI_m[$i] = "<a href='http://web.search.naver.com/search.naver?where=site&sm=dir_hty&query=%BC%A6%B9%F6%B5%F0&ctgids=' target='_blank' onClick=\"MM_popupMsg('$tmsg-샷버디 클릭후에 로그인 해주시면 됩니다')\"><img src='http://soncook2.cdn2.cafe24.com/shotbirdie/torrent_img01.GIF' border='0'></a>";
$url_join_m[$i] = "<a href='http://web.search.naver.com/search.naver?where=site&sm=dir_hty&query=%BC%A6%B9%F6%B5%F0&ctgids=' target='_blank' onClick=\"MM_popupMsg('$tmsg-샷버디 클릭후에 로그인 해주시면 됩니다')\"><img src='http://soncook2.cdn2.cafe24.com/shotbirdie/torrent_img02.GIF' border='0'></a>";
}
}else{ //로그인시
$magnetURI_m[$i] = "<a href='$magnetURI[$i]'><img src='http://soncook2.cdn2.cafe24.com/shotbirdie/torrent_img01.GIF' border='0'></a>";
$url_join_m[$i] = "<a href='$url_join[$i]'><img src='http://soncook2.cdn2.cafe24.com/shotbirdie/torrent_img02.GIF' border='0'></a>";
}
//중복내용
echo "
<table width='100%' border='0' cellspacing='0' cellpadding='0'>
<tr>
<td><table width='100%' height='33' border='0' cellpadding='0' cellspacing='0'>
<tr>
<td width='38' align='center'>$num</td>
<td width='500'>$wr_subject[$i]</td>
<td width='66' align='center'>$size[$i]MB</td>
<td width='38' align='center'>$numSeeders[$i]</td>
<td width='44' align='center'>$magnetURI_m[$i]</td>
<td width='44' align='center'>$url_join_m[$i]</td>
</tr>
</table></td>
</tr>
<tr>
<td height='1' bgcolor='EDEDED'></td>
</tr>
</table>
";
//echo "$num - <a href='$url_join[$i]' target='_blank'>$wr_subject[$i]</a><br>";
}//end for($i)
//테이블하단
echo "
</td>
</tr>
<tr>
<td align='center'>
<!--페이지-->
<a href='$PHP_SELF_SELF?shotbirdie_tkey=$shotbirdie_tkey&sort_code=$sort_code&tpage=1'><span $tcolor01>1</span></a> |
<a href='$PHP_SELF_SELF?shotbirdie_tkey=$shotbirdie_tkey&sort_code=$sort_code&tpage=2'><span $tcolor02>2</span></a> |
<a href='$PHP_SELF_SELF?shotbirdie_tkey=$shotbirdie_tkey&sort_code=$sort_code&tpage=3'><span $tcolor03>3</span></a>
</td>
</tr>
</table>
";
} //end if(shotbirdie_tkey)
?>
<div class="jyGuideBox">
<p class="txt_title">반드시 읽어보세요.</p>
<ul>
<li>본 서비스는 토렌트 외부 검색기로, 토렌트 통합검색을 제공합니다.</li>
<li>검색자료는 서버에 저장, 관리 하지 않으며, 검색 및 다운로드만을 제공합니다.</li>
<li>업로드 서비스는 제공되지 않으며, 이미지를 제공하지 않습니다.</li>
<li>일부 파일은 다운로드 되지 않을 수 있으며, 자료의 질에 대해서는 보장하지 않습니다.</li>
</ul>
</div>
<?
//유가정보
?>
<?
@include_once("$g4[path]/tail.php");
?>

 AnyTXT.Searcher.1.2.382.exe
 Atomic.Email.Hunter.v14.4.0.371-SeuPirate.7z
 Reverse-Engineering-안드로이드-학습.pdf